How To Create a Restaurant Menu QR Code
If you want customers to view your restaurant menu instantly by scanning a QR code, this guide is for you.
You might be:
- Placing QR codes on restaurant tables
- Printing QR on table tents or stands
- Adding QR on takeaway packaging
- Using contactless digital menus
- Wanting to update menu items without reprinting
- Tracking how many customers view your menu
Before You Create the QR Code
Before starting, make sure you have:
- Your restaurant name ready
- Your menu items list (Excel file or ready to enter manually)
- Your restaurant logo (optional but recommended)
- Contact details (optional)
Optimise for mobile before printing
Most customers scan using a mobile phone while seated at a table. Make sure your menu is clear, simple, and easy to read on a small screen before placing QR codes in your venue.
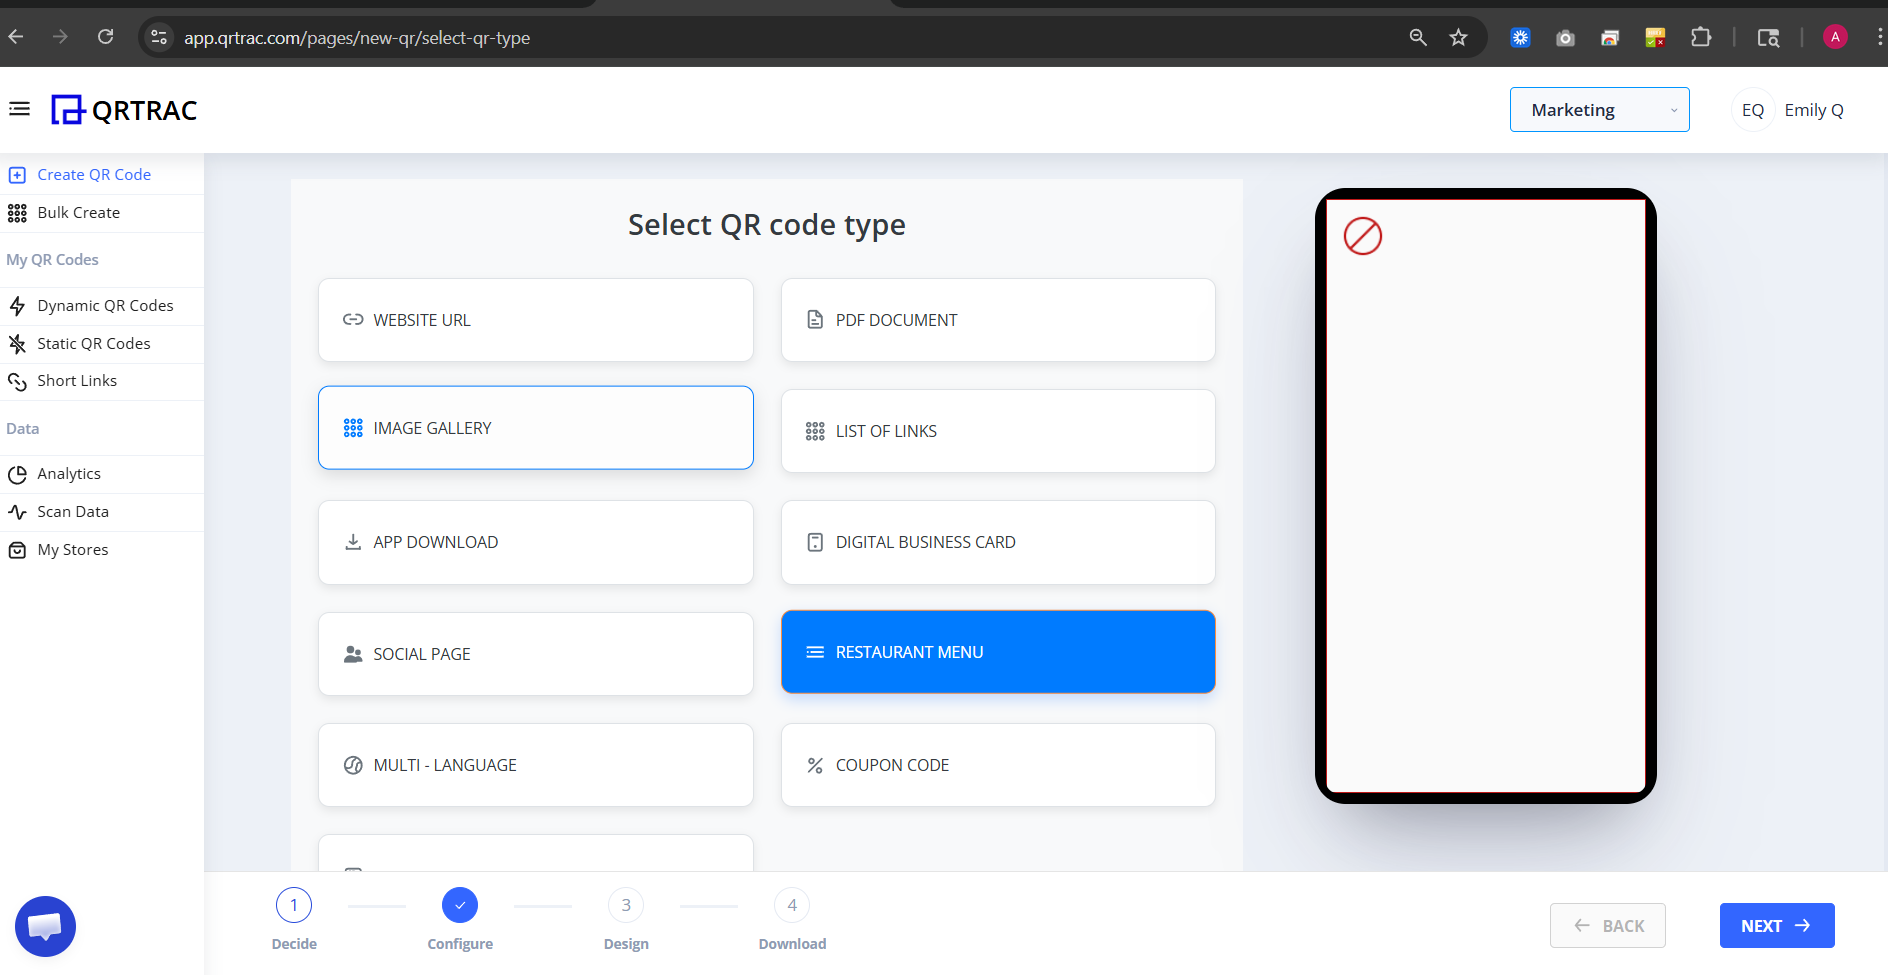
Step 1: Login & Start
- Login to your QRTRAC dashboard
- Click Create QR Code
- Select Restaurant Menu QR Code
Step 2: Enter Restaurant Information
You will see the Restaurant Information fields. Enter:
- Restaurant Name
- Restaurant Type (for example: Indian, Italian, Cafe, Fast Food)
- Upload a restaurant image (optional)
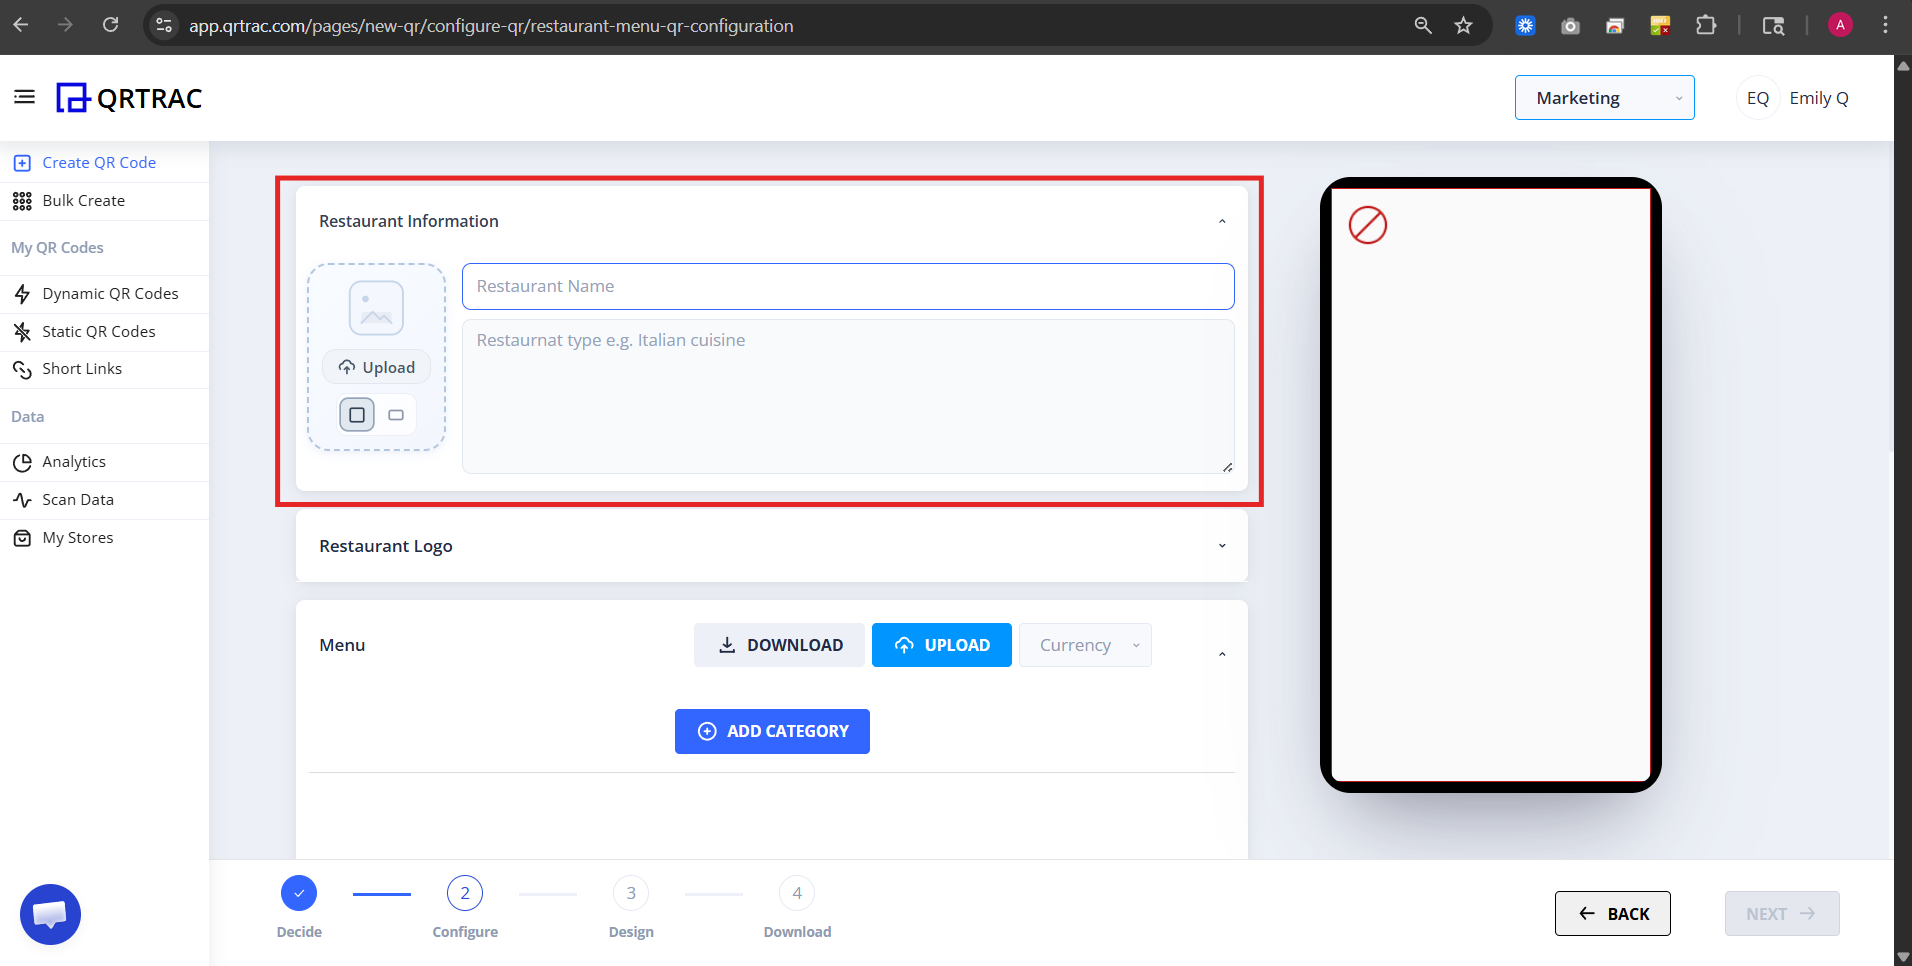
This information will appear at the top of your digital menu page.
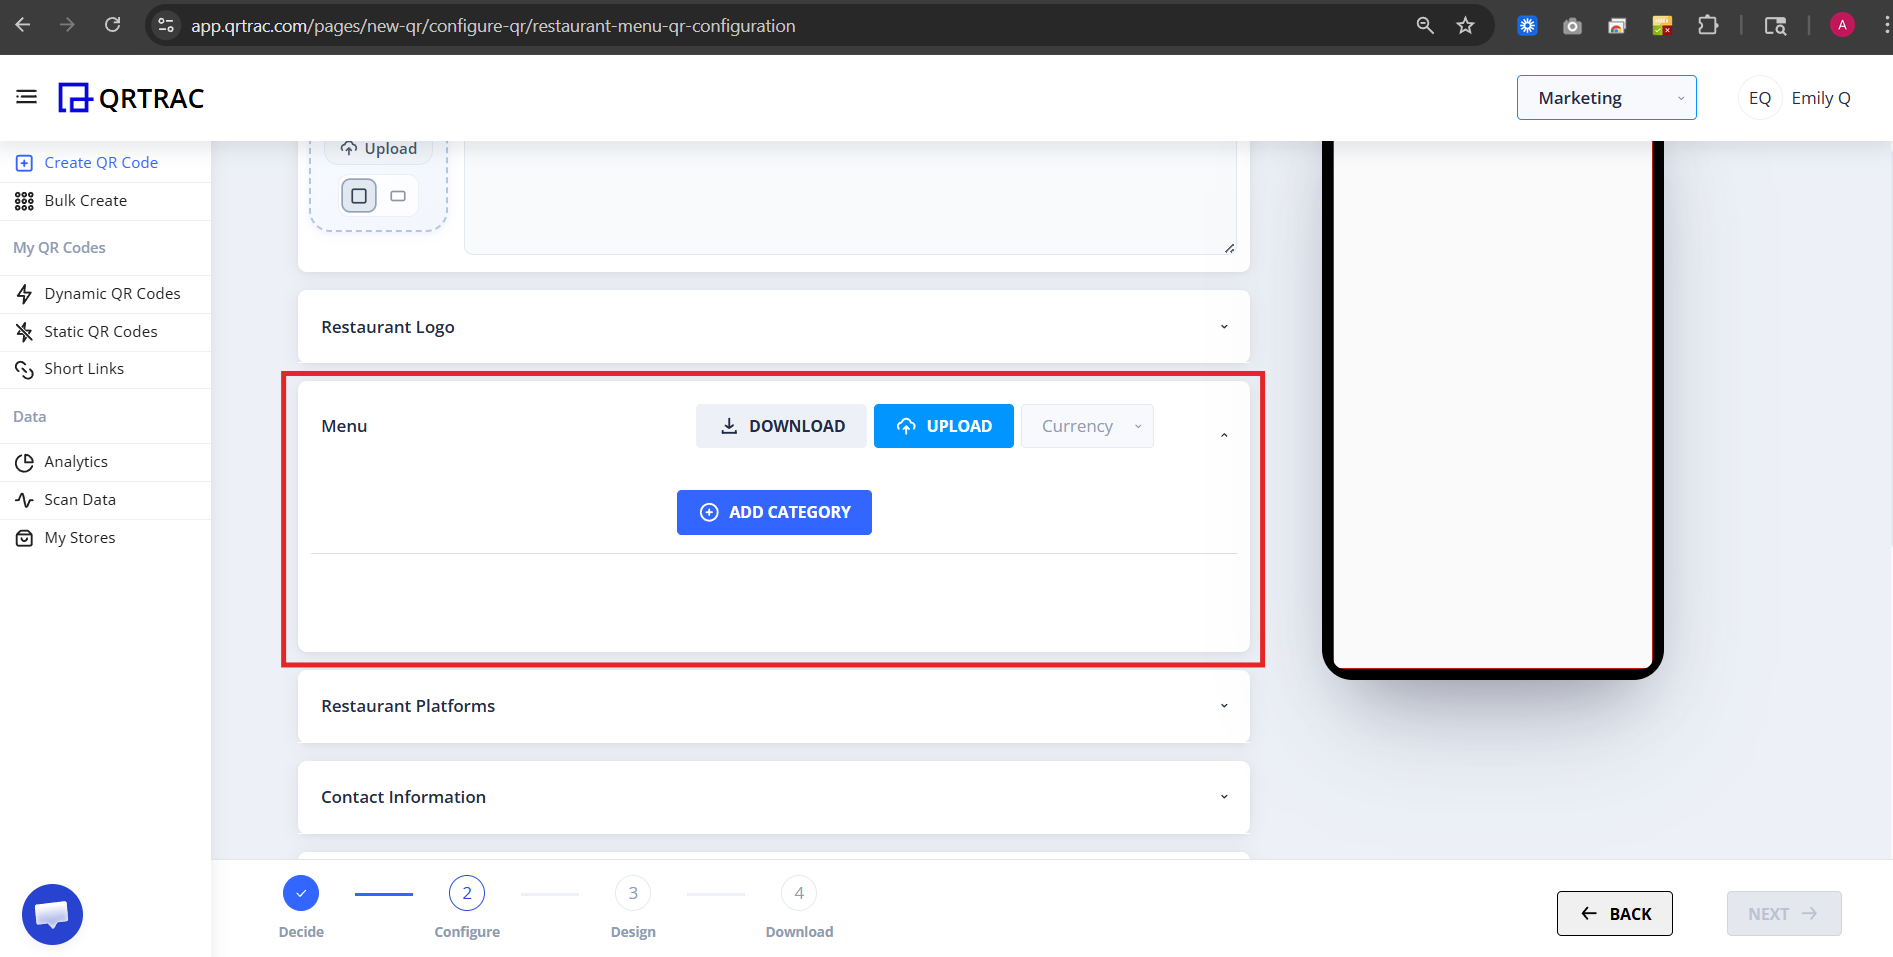
Step 3: Add Your Menu
You have two options for adding menu items:
Option 1 — Upload Excel
- Click Download menu excel template
- Fill in your categories and items
- Save the file
- Click Upload
Option 2 — Add Manually
- Click Add Category
- Enter a category name (e.g. Starters, Mains, Drinks)
- Add individual menu items
- Enter price, description, and optional image
Common Problems
❌ "My menu is empty after scanning"
- No menu items were added — only categories created
- Excel file format doesn't match the template
- Items were added but not saved before moving to the next step
Fix: Make sure at least one category and one item are saved before clicking Next.
❌ "Menu layout looks broken"
- Excel columns don't match the downloaded template
- Required fields left empty
- Prices entered with unsupported characters (e.g. currency symbols in wrong column)
Fix: Re-download the template and copy your data into the correct columns.
❌ "Logo or image not showing"
- Image not uploaded or upload didn't complete
- File size too large
- Unsupported file format used
Fix: Use PNG or JPG format and keep file size under 2 MB.
Step 4: Add Contact Information (Optional)
You can add:
- Phone number
- Website
- Address
- Notes
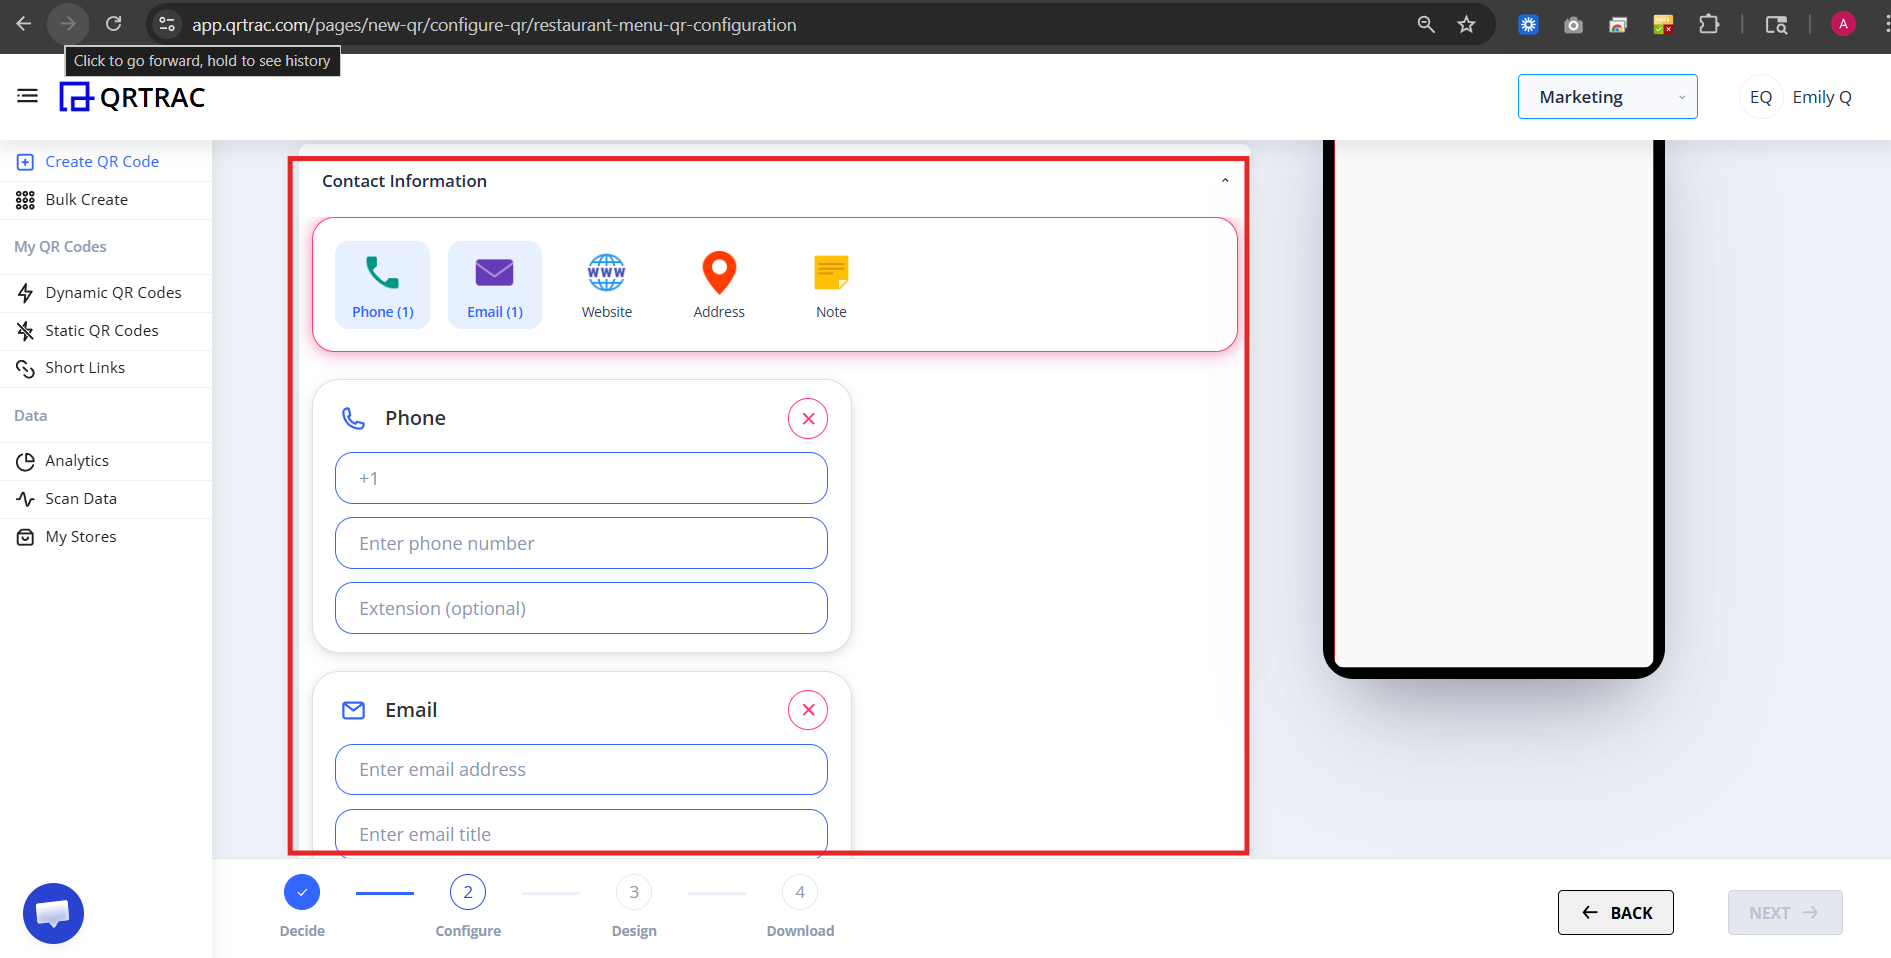
This helps customers contact or locate your restaurant directly from the menu page.
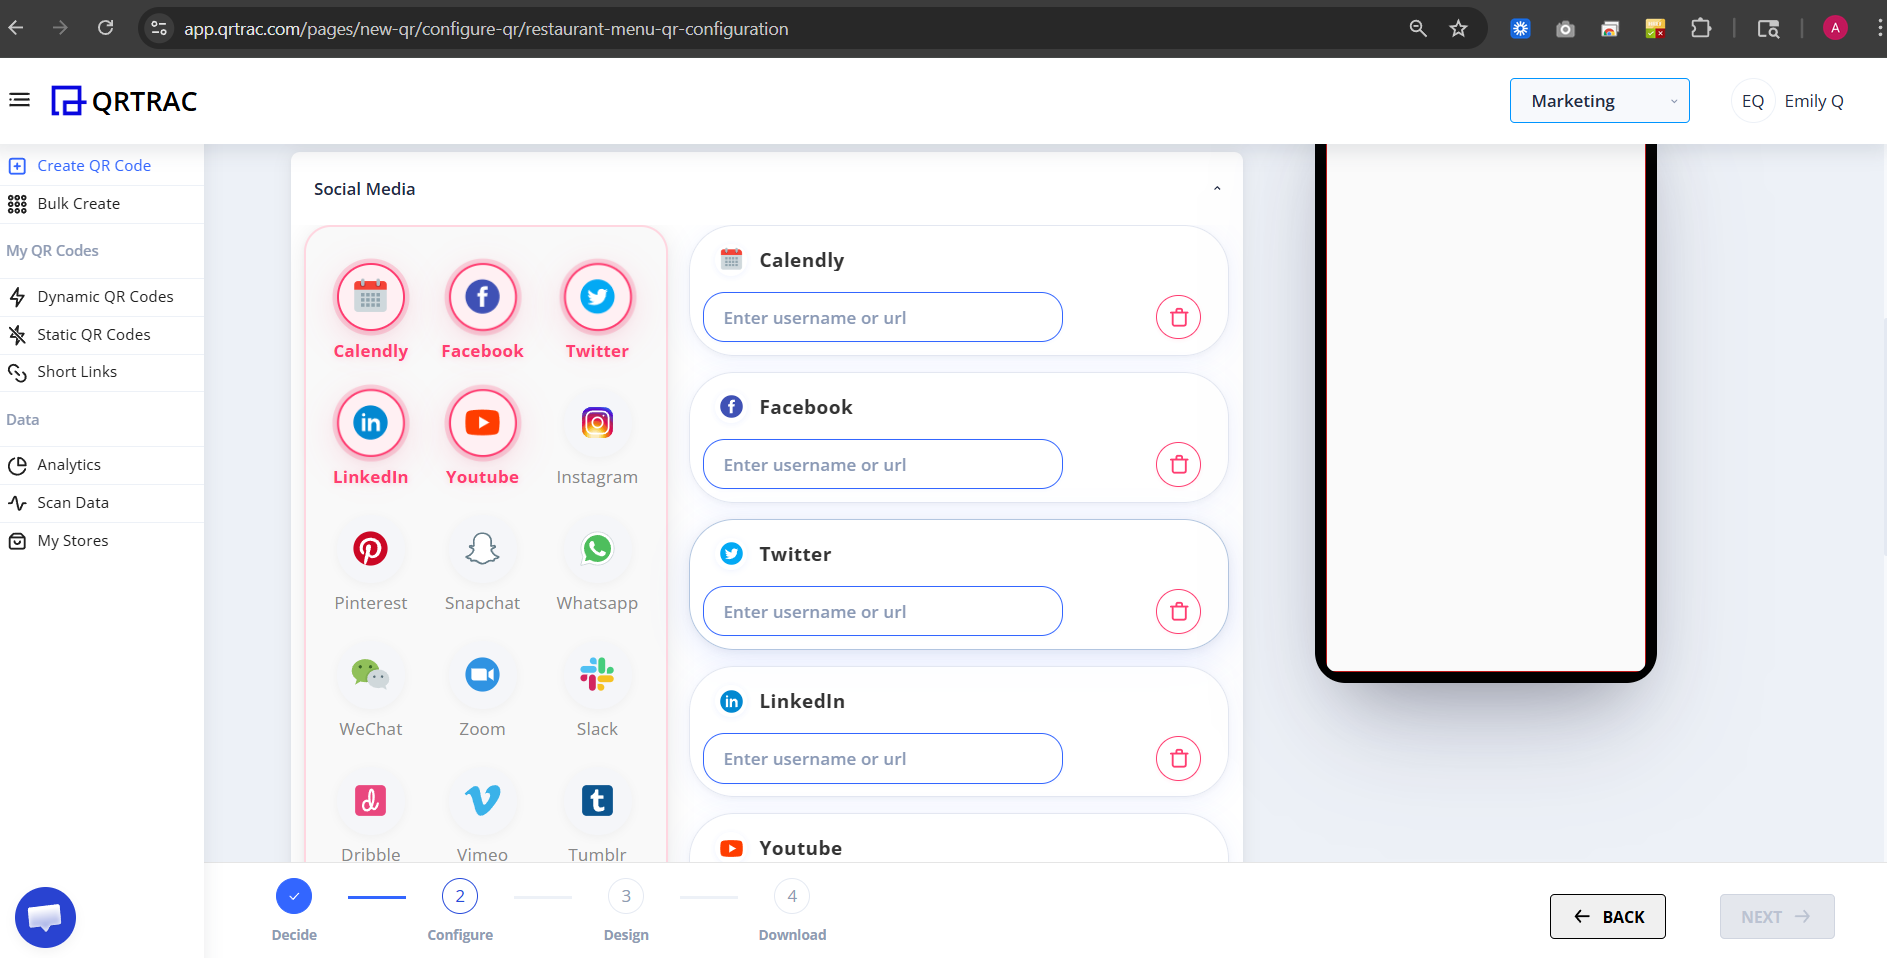
Step 5: Add Social Media (Optional)
You can add links to:
- YouTube
- Zomato or other platforms
Customers can open your profiles directly from the digital menu.
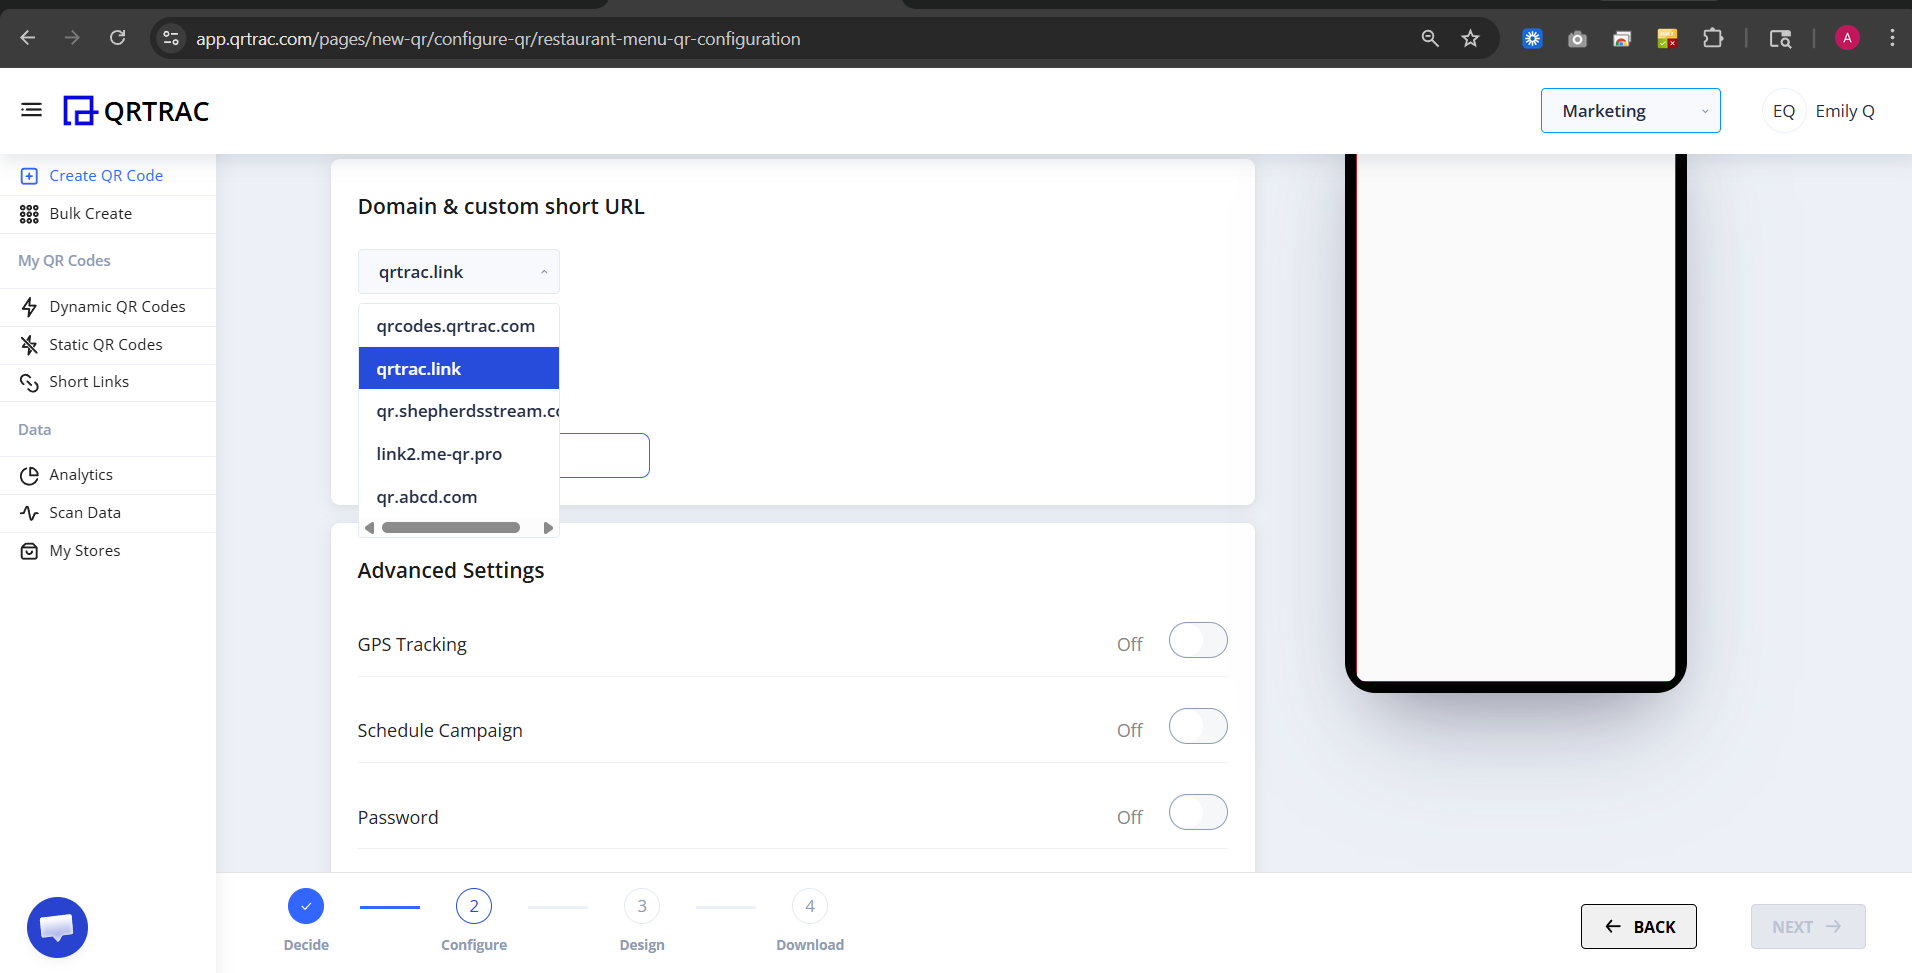
Step 6: Configure Domain & Advanced Settings (Optional)
You can customise:
- Short URL
- Custom domain
- GPS tracking
- Schedule campaign
- Password protection
- Age restriction
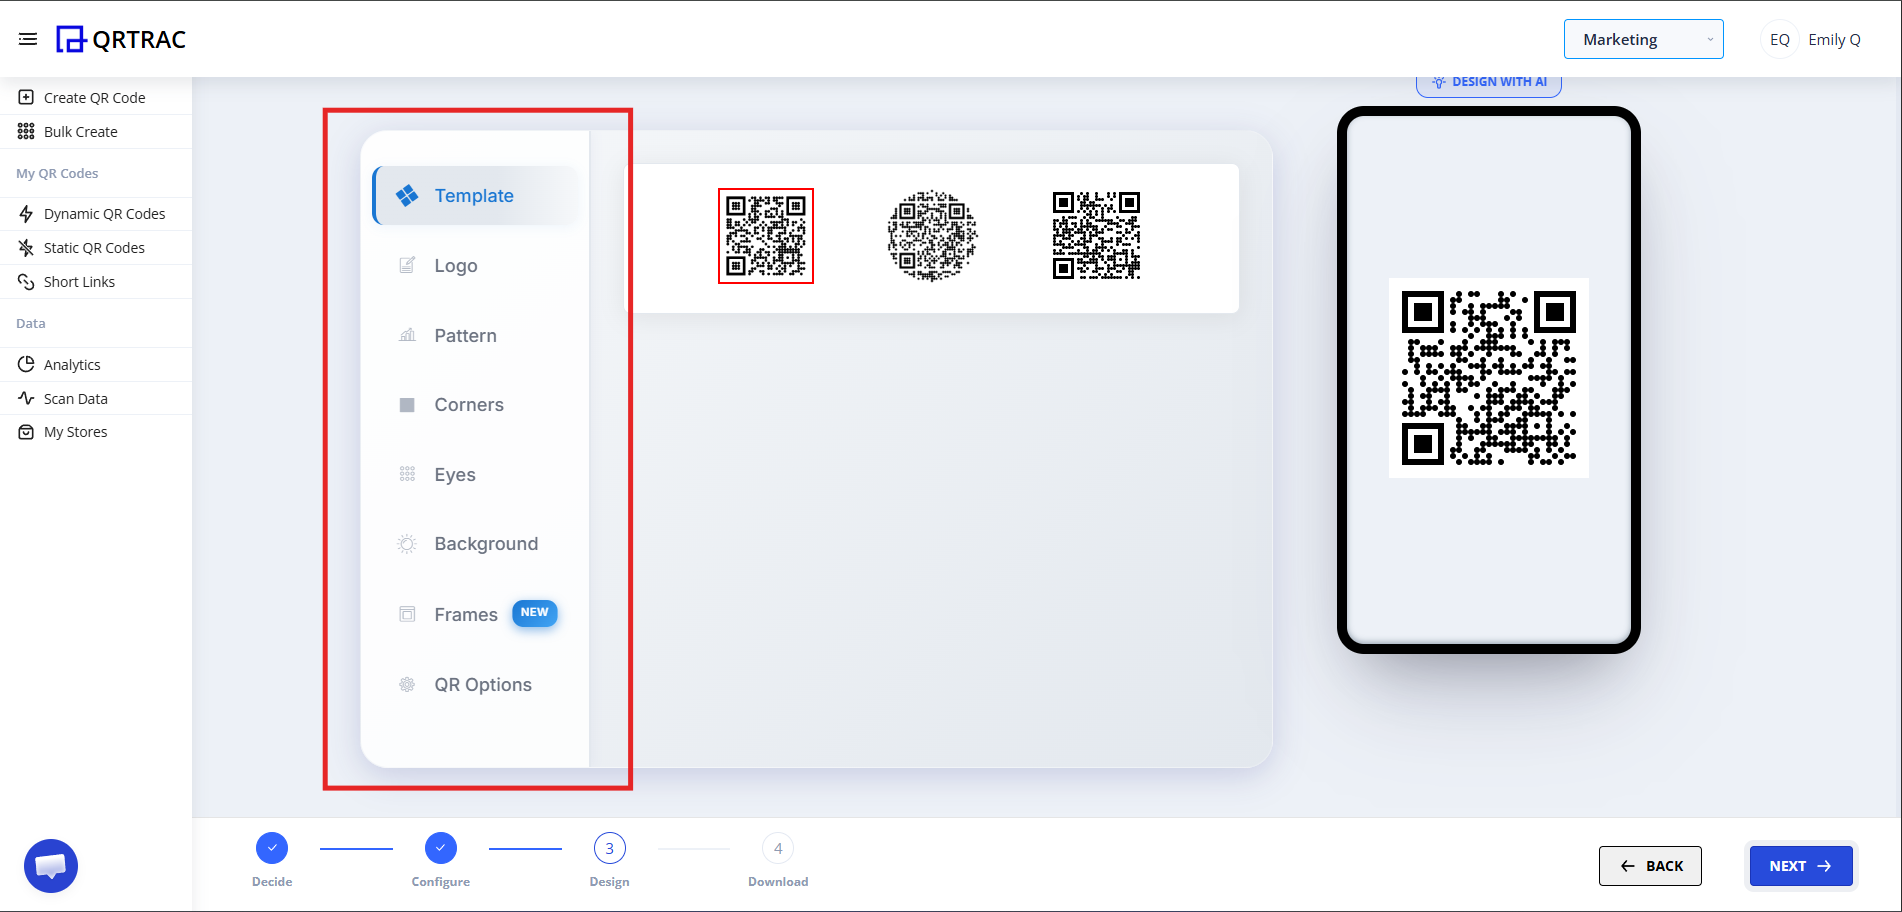
Step 7: Click Next → Design Your QR
Click Next to move to the Design section. Here you can:
- Change QR color
- Add your restaurant logo
- Customise the shape
- Add a background
- Match your restaurant branding
Dynamic QR — No Reprinting Needed
Update your menu items, prices, and categories at any time from the QRTRAC dashboard without reprinting table tents or packaging.
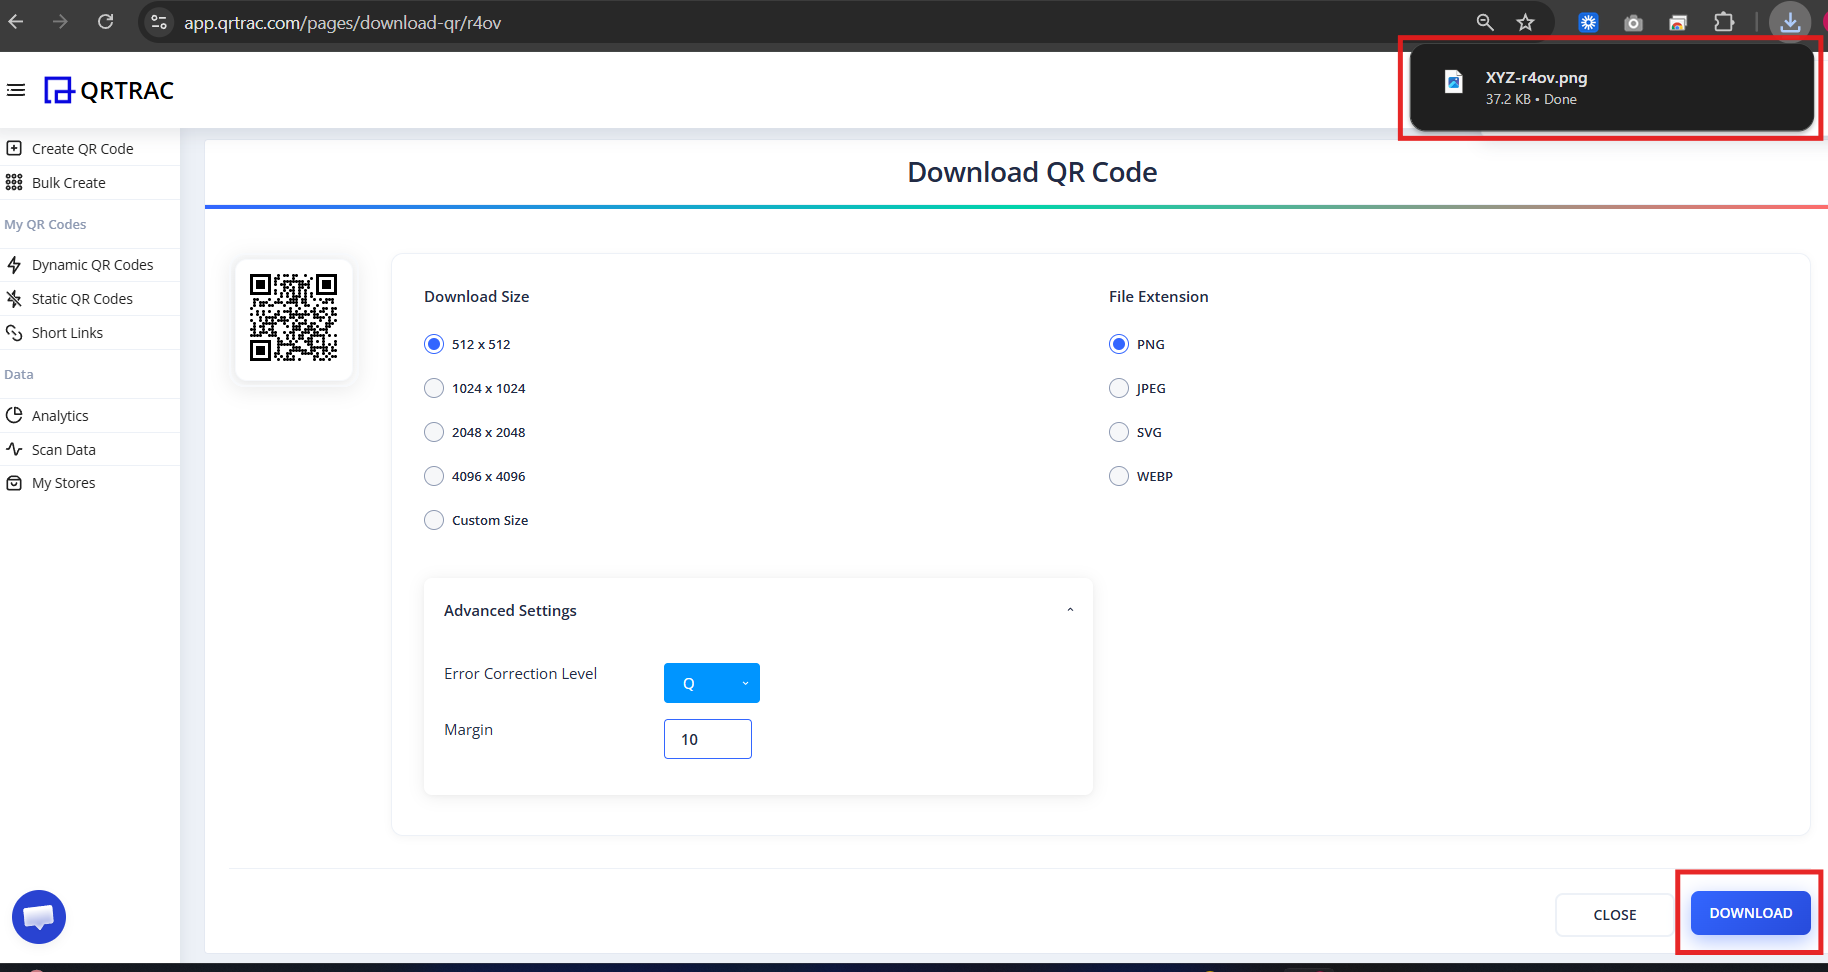
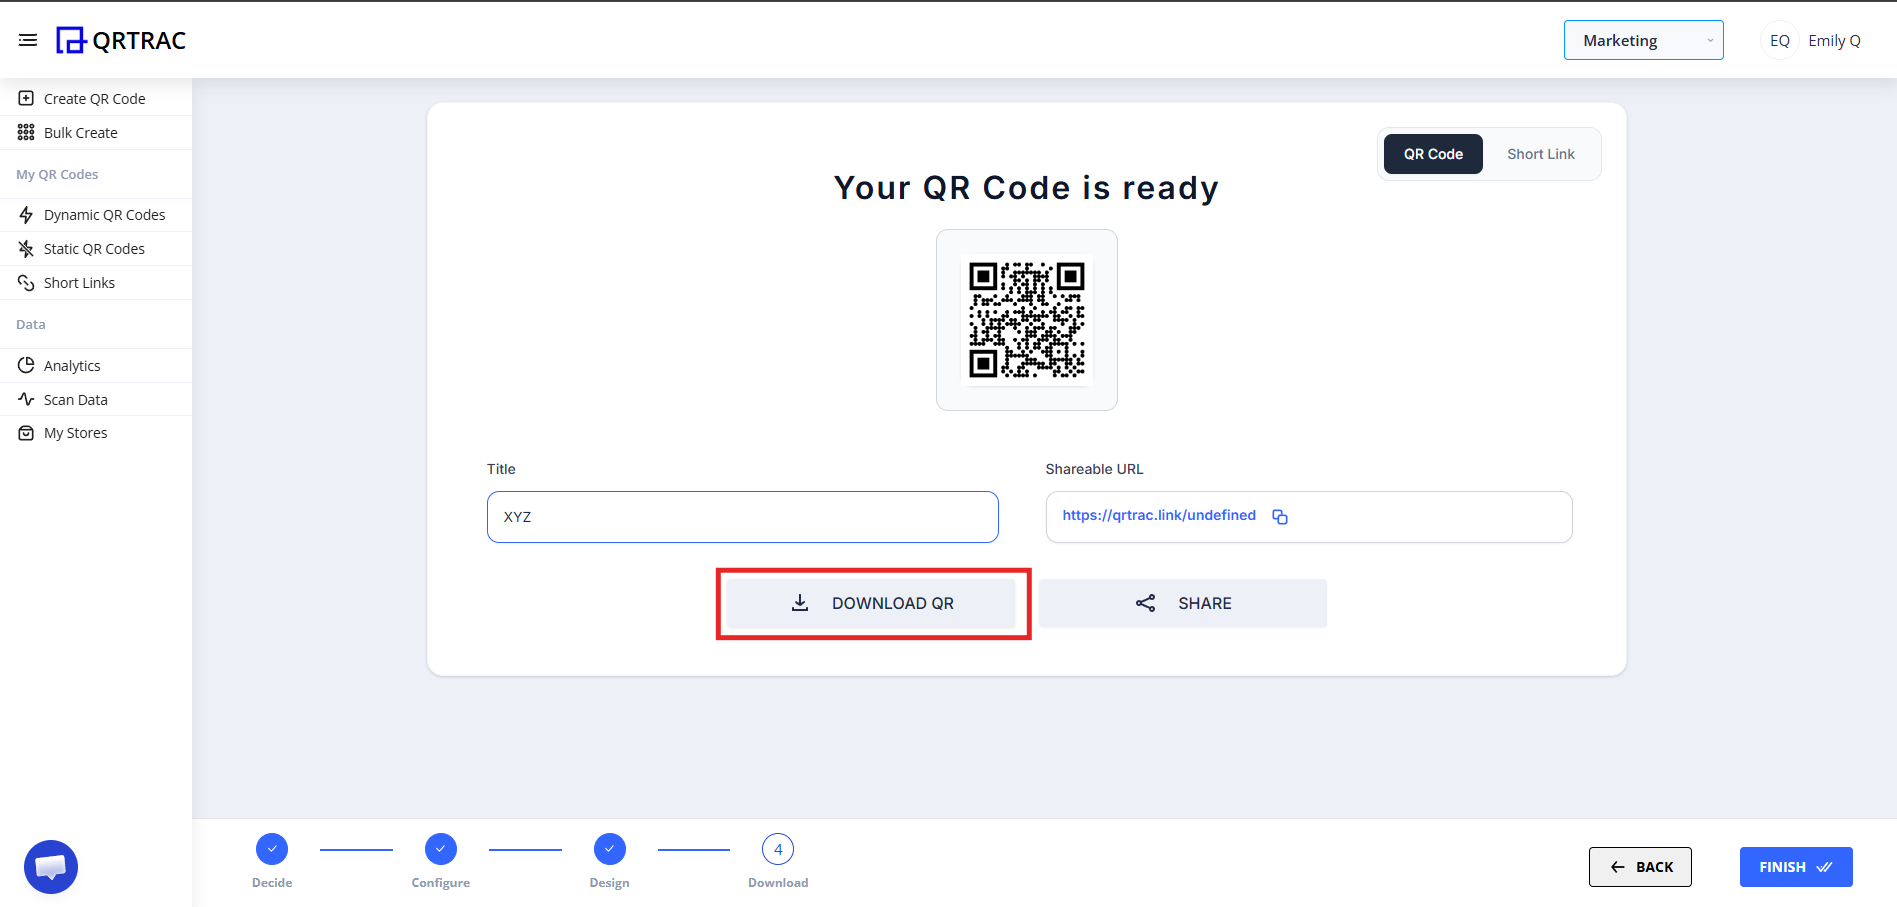
Step 8: Review & Download
- Click Next to proceed to the download screen
- Preview your menu QR code
- Select your preferred download format:
- PNG — best for general use
- SVG — best for printing (scalable)
- PDF — best for sharing or print-ready files
- Click Download
Tip: Always test your QR code with a smartphone camera straight from your computer monitor before you download and print it.
Popular Use Cases
Restaurant Menu QR Codes work anywhere customers need to access your menu quickly:
- Table Menus
- Takeaway Packaging
- QR Table Tents
- Delivery Apps
- Hotel In-Room Dining
- Catering Events
Frequently Asked Questions
Can I update menu items without reprinting?
Yes. Because this is a Dynamic QR Code, you can update items, prices, categories, and descriptions at any time from your QRTRAC dashboard — no reprinting required.
Can I add photos to menu items?
Yes. You can upload an image for each menu item. Use clear, well-lit photos in PNG or JPG format to help customers make choices faster.
Can customers order through the QR?
The QR Menu displays your menu digitally. For ordering, you can add a link to your ordering platform (e.g. a website or delivery app) via the contact or social media fields.
Can I track how many customers view the menu?
Yes. The QRTRAC analytics dashboard shows scan volume, device types, geographic locations, and timing — giving you insight into customer engagement across locations.
Common Mistakes
- ❌ Setting a QR expiry date that cuts off seasonal menus mid-service.
- ❌ Uploading a low-resolution or stretched logo that looks unprofessional.
- ❌ Not testing the menu on a mobile device before placing QR codes on tables.
- ❌ Printing table tents before all menu items and prices are entered.
Launch Checklist
- All menu categories and items added
- Restaurant name and logo uploaded
- Menu tested on a real mobile device
- QR design matches restaurant branding
- Scan analytics confirmed active