How To Create Coupon Code QR
Let customers scan a QR code and instantly claim a discount — in-store, online, or both. This guide walks you through creating a fully configured Coupon QR Code including expiry dates, redemption limits, password protection, and store location.
Tip: Always test your QR code with a smartphone camera straight from your computer monitor before you download and print it.
Popular Use Cases:
- In-Store Promotions
- Online Checkout Discounts
- Festival Sales
- Loyalty Rewards
- Product Launch Offers
- Trade Show Giveaways
Before You Create the QR Code
Make sure you have already decided:
- Discount percentage or fixed amount
- Coupon code
- Expiry date
- Terms & conditions
- Redemption type (Online / In-store / Both)
Plan before you build
Launching a coupon without an expiry date or redemption limits can result in unlimited uncontrolled discounts. Decide all campaign rules before you start configuring.
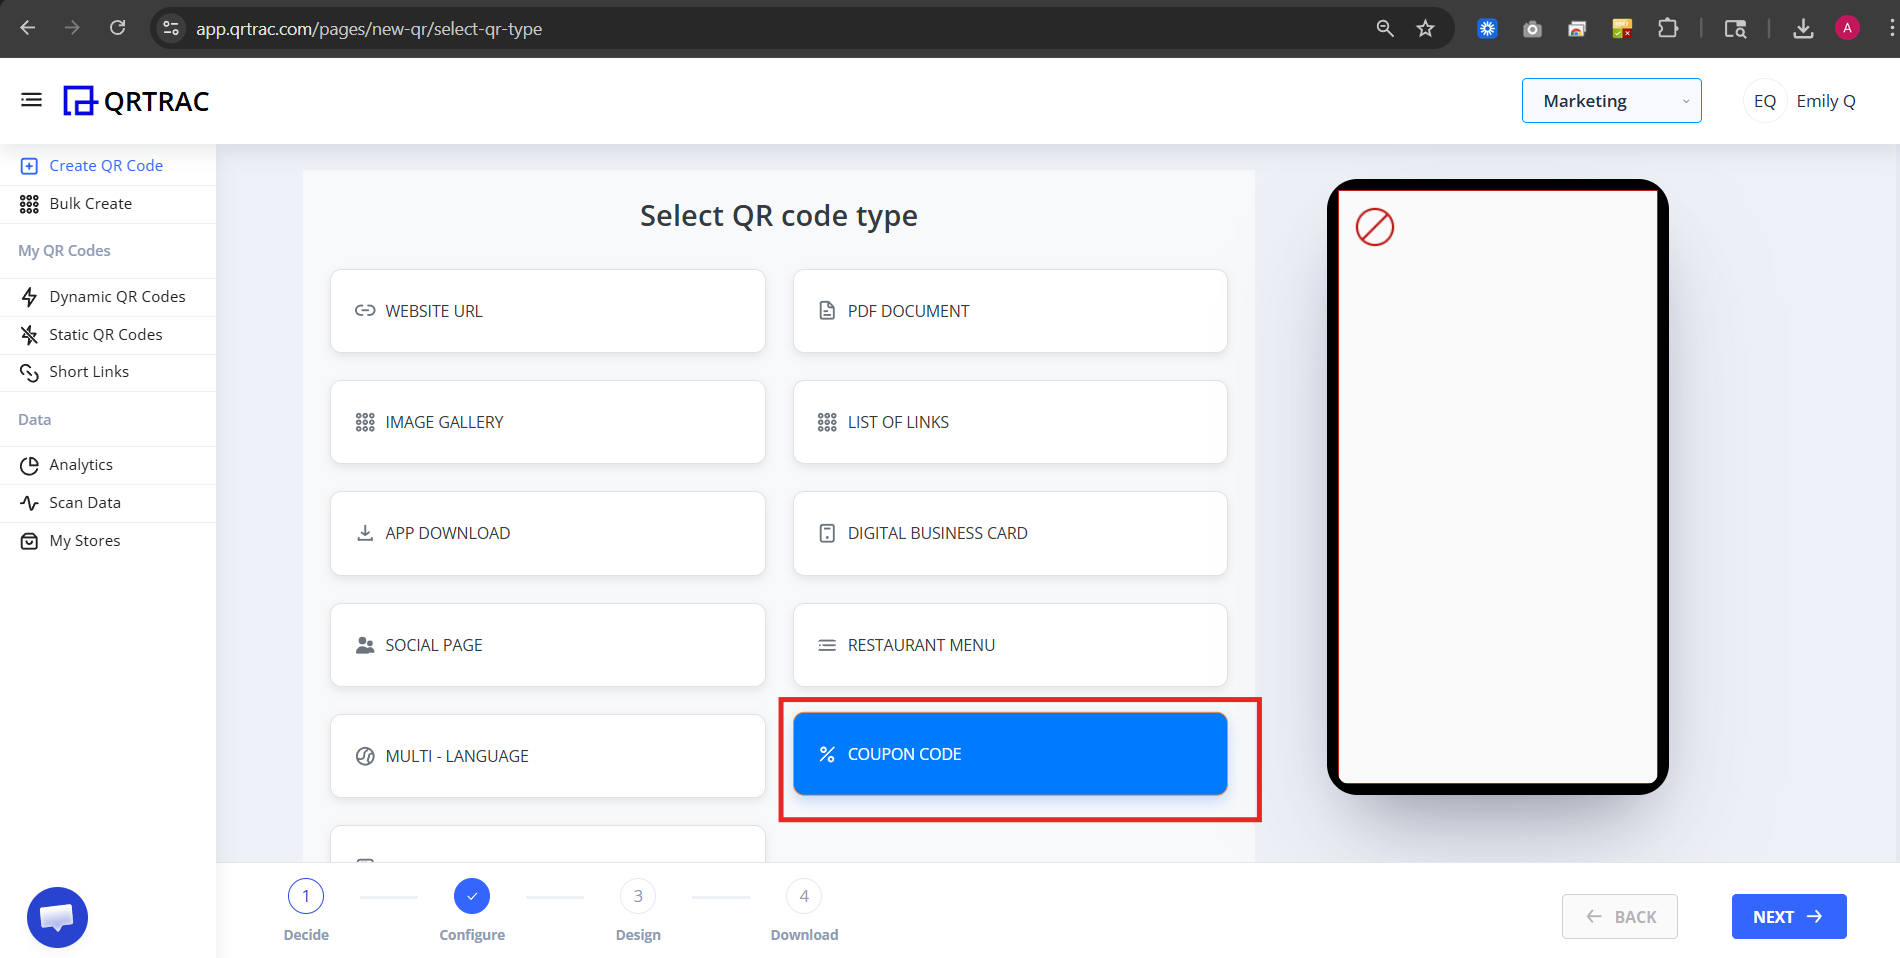
Step 1: Login & Select Coupon QR (Decide Phase)
- Login to your QRTRAC dashboard
- Click Create QR Code
- Select Coupon QR Code
- Click Next
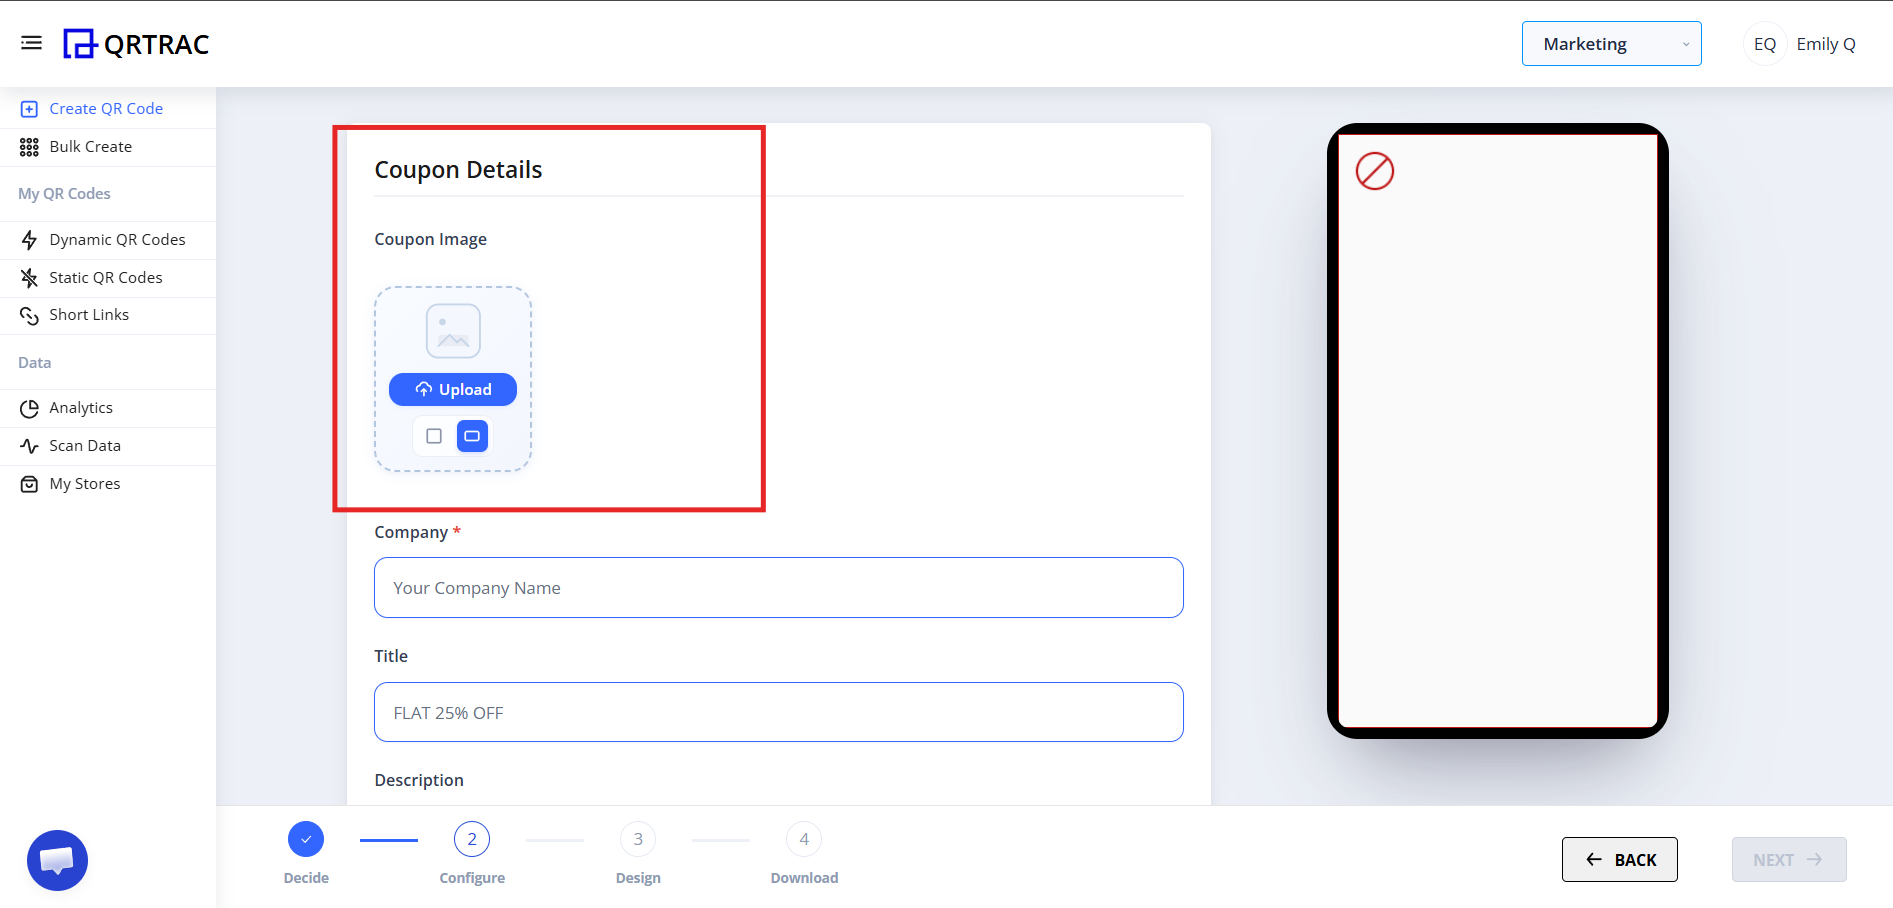
Step 2: Configure Coupon Details (Configure Phase)
This is the most important section. Work through each sub-section carefully.
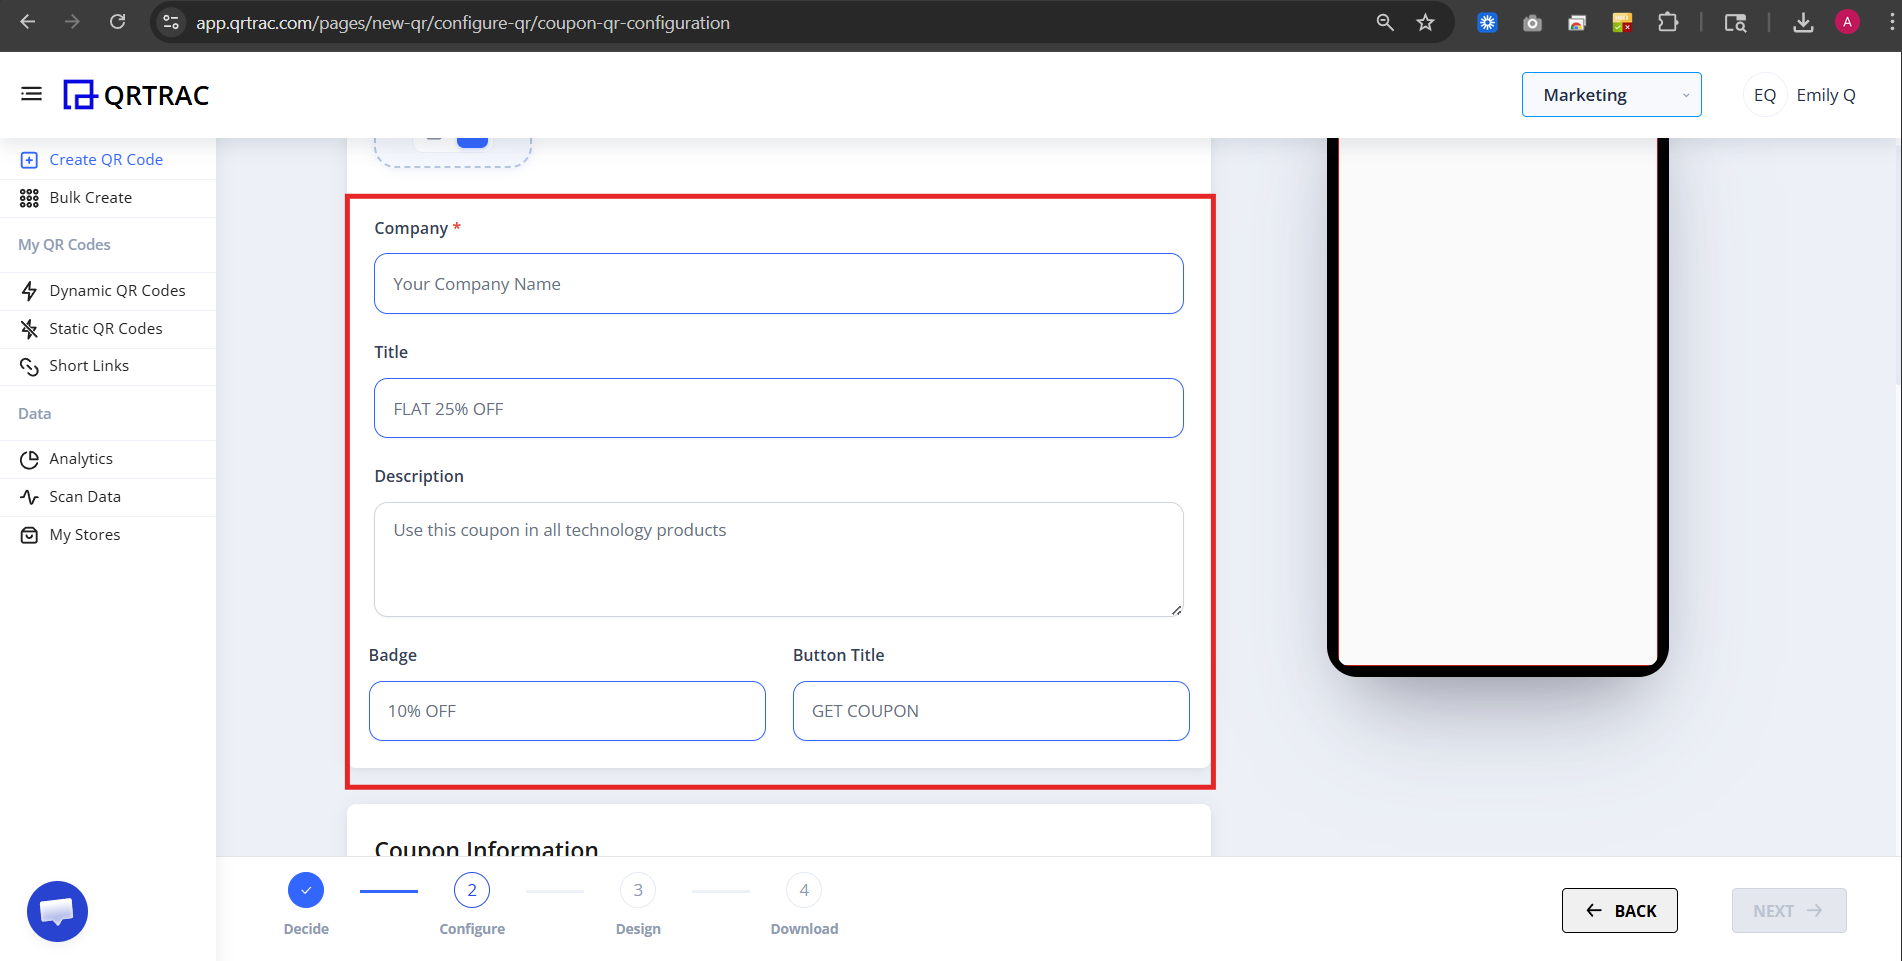
A) Basic Coupon Details
Coupon Image — Upload your promotional banner or coupon image.
B) Coupon Information Section
This section controls redemption rules.
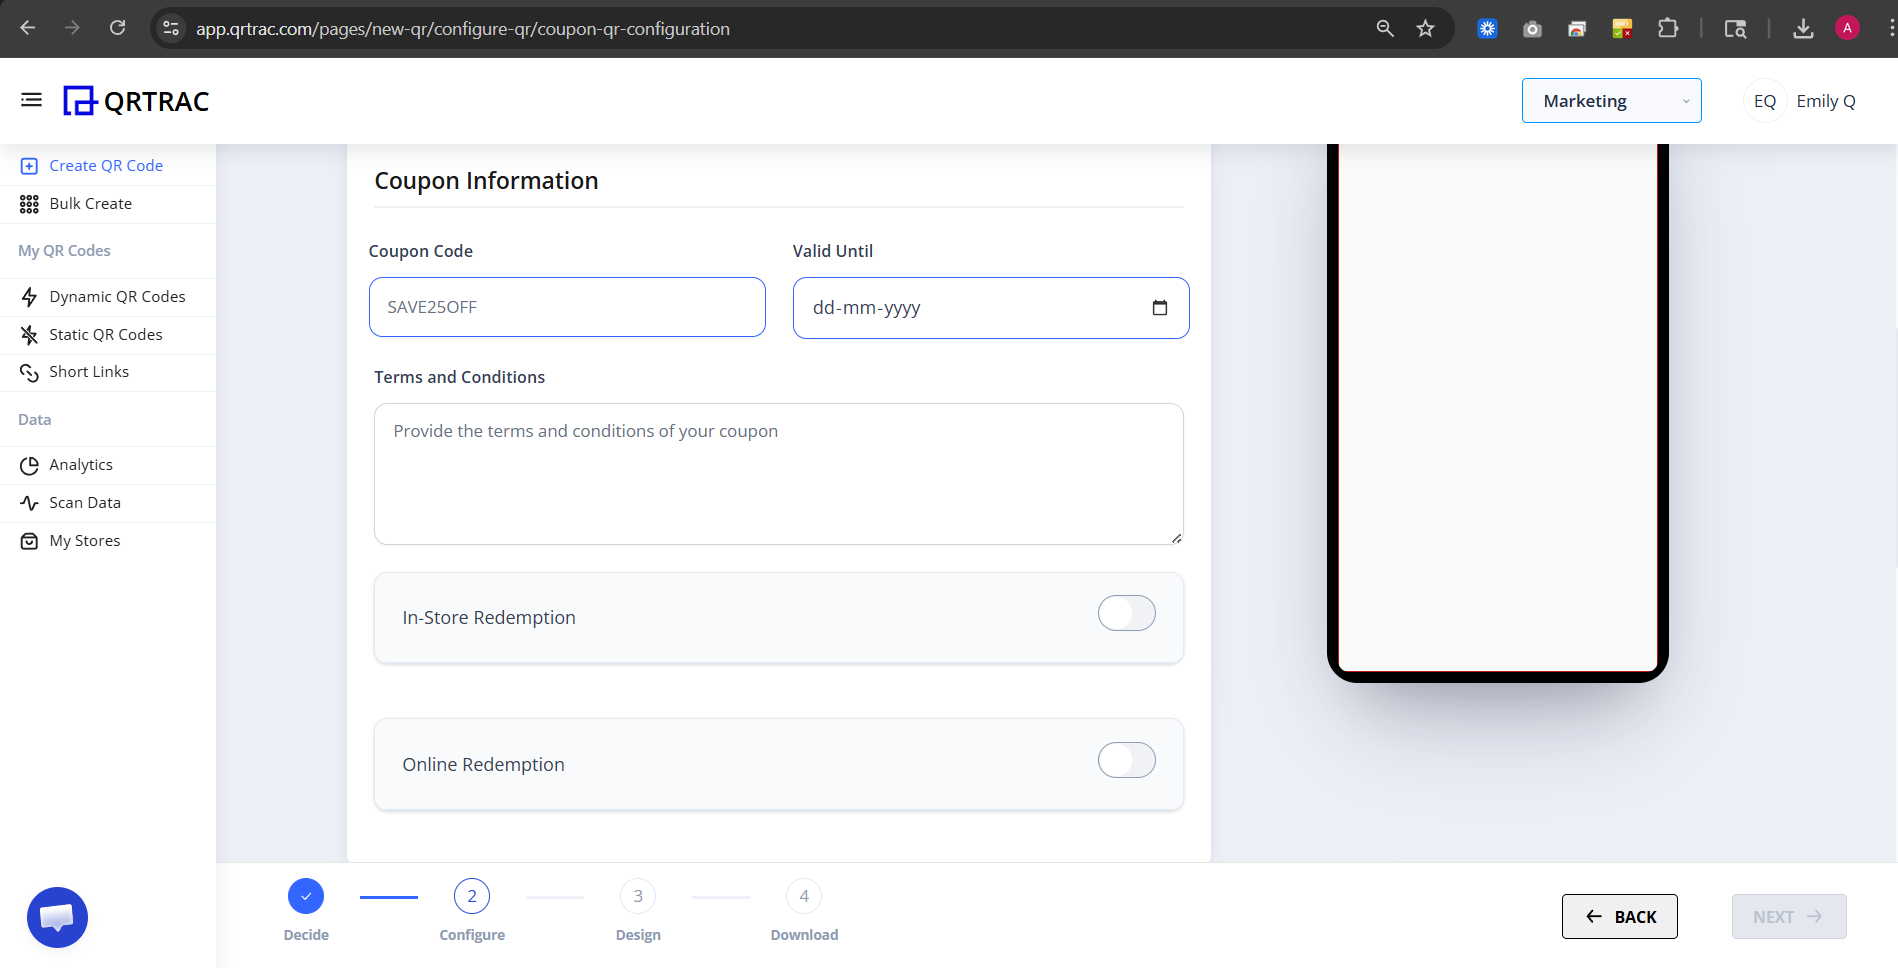
1) Coupon Code
Enter your actual coupon code. Example: SAVE250OFF
2) Valid Until
Select expiry date. Always set an expiry to avoid misuse.
3) Terms and Conditions
Add rules such as:
- Minimum purchase required
- Not valid on discounted items
- One-time use per user
- Cannot combine with other offers
C) In-Store Redemption Settings
Toggle ON if customers redeem physically at your location.

When enabled, these options appear:
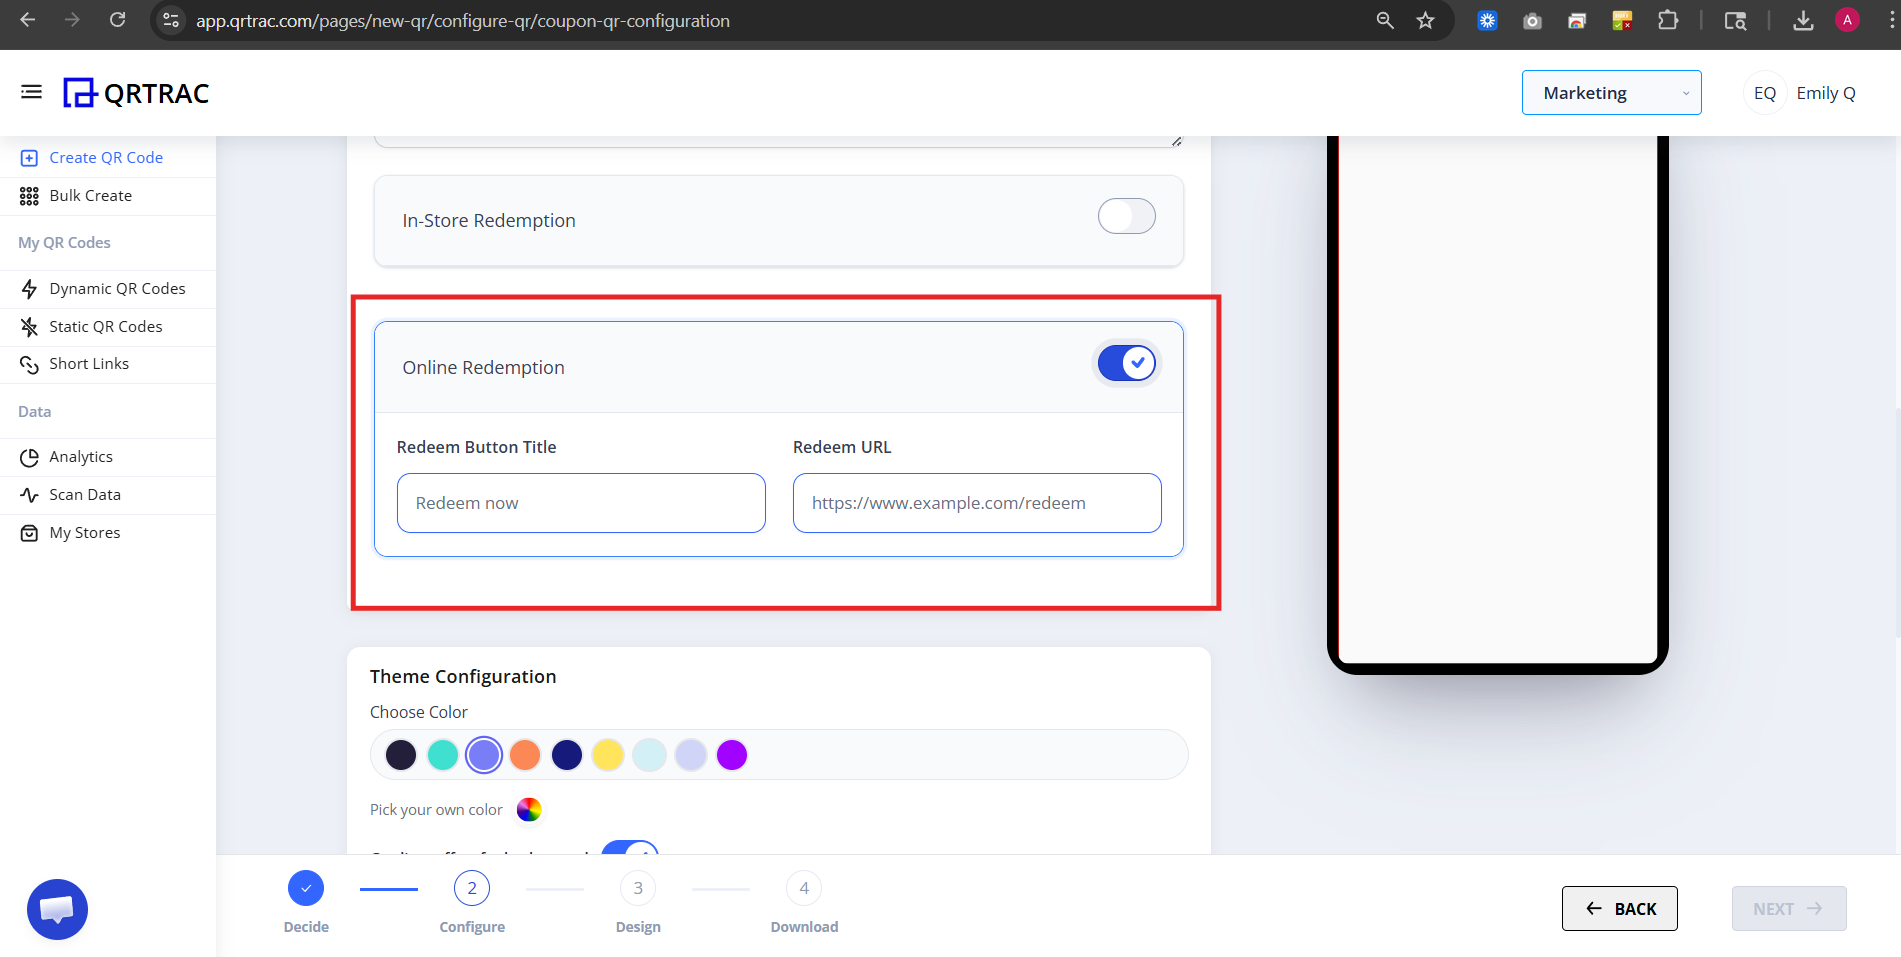
D) Online Redemption Settings
Toggle ON if the coupon is redeemable on your website.
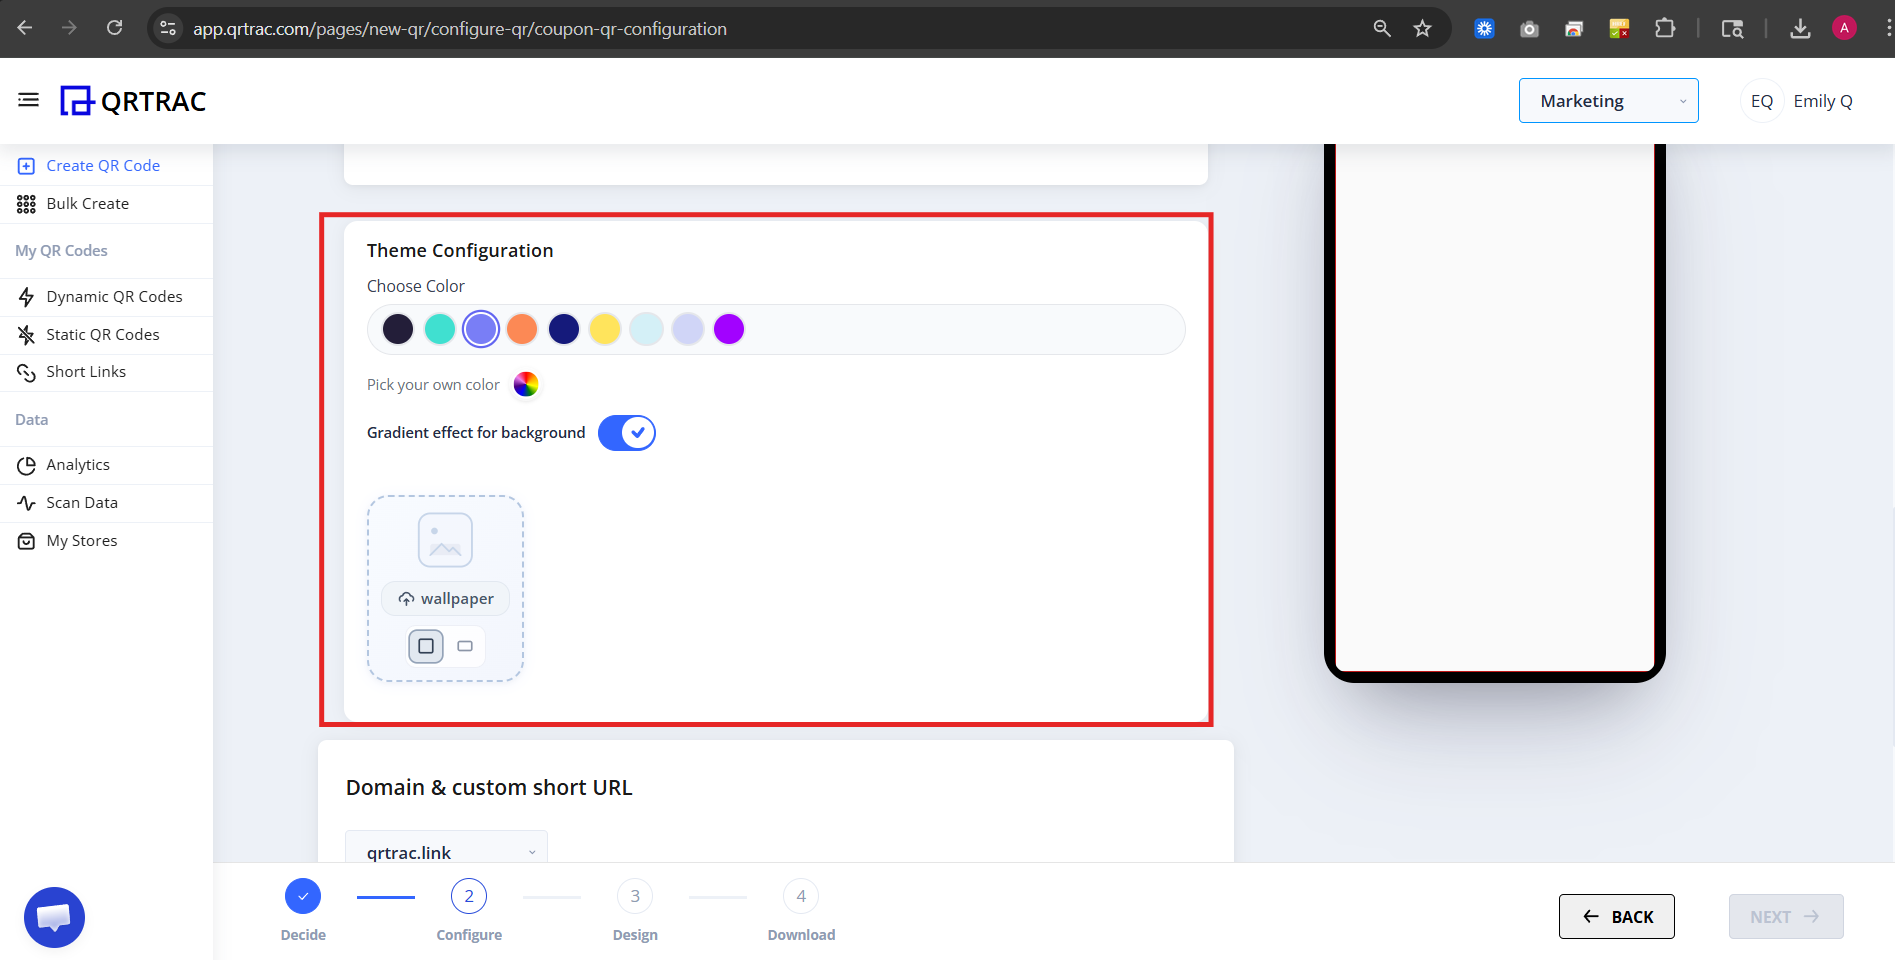
E) Theme Configuration
Customize your coupon landing page appearance. Options available:
- Choose color
- Pick custom color
- Enable gradient background
- Add wallpaper
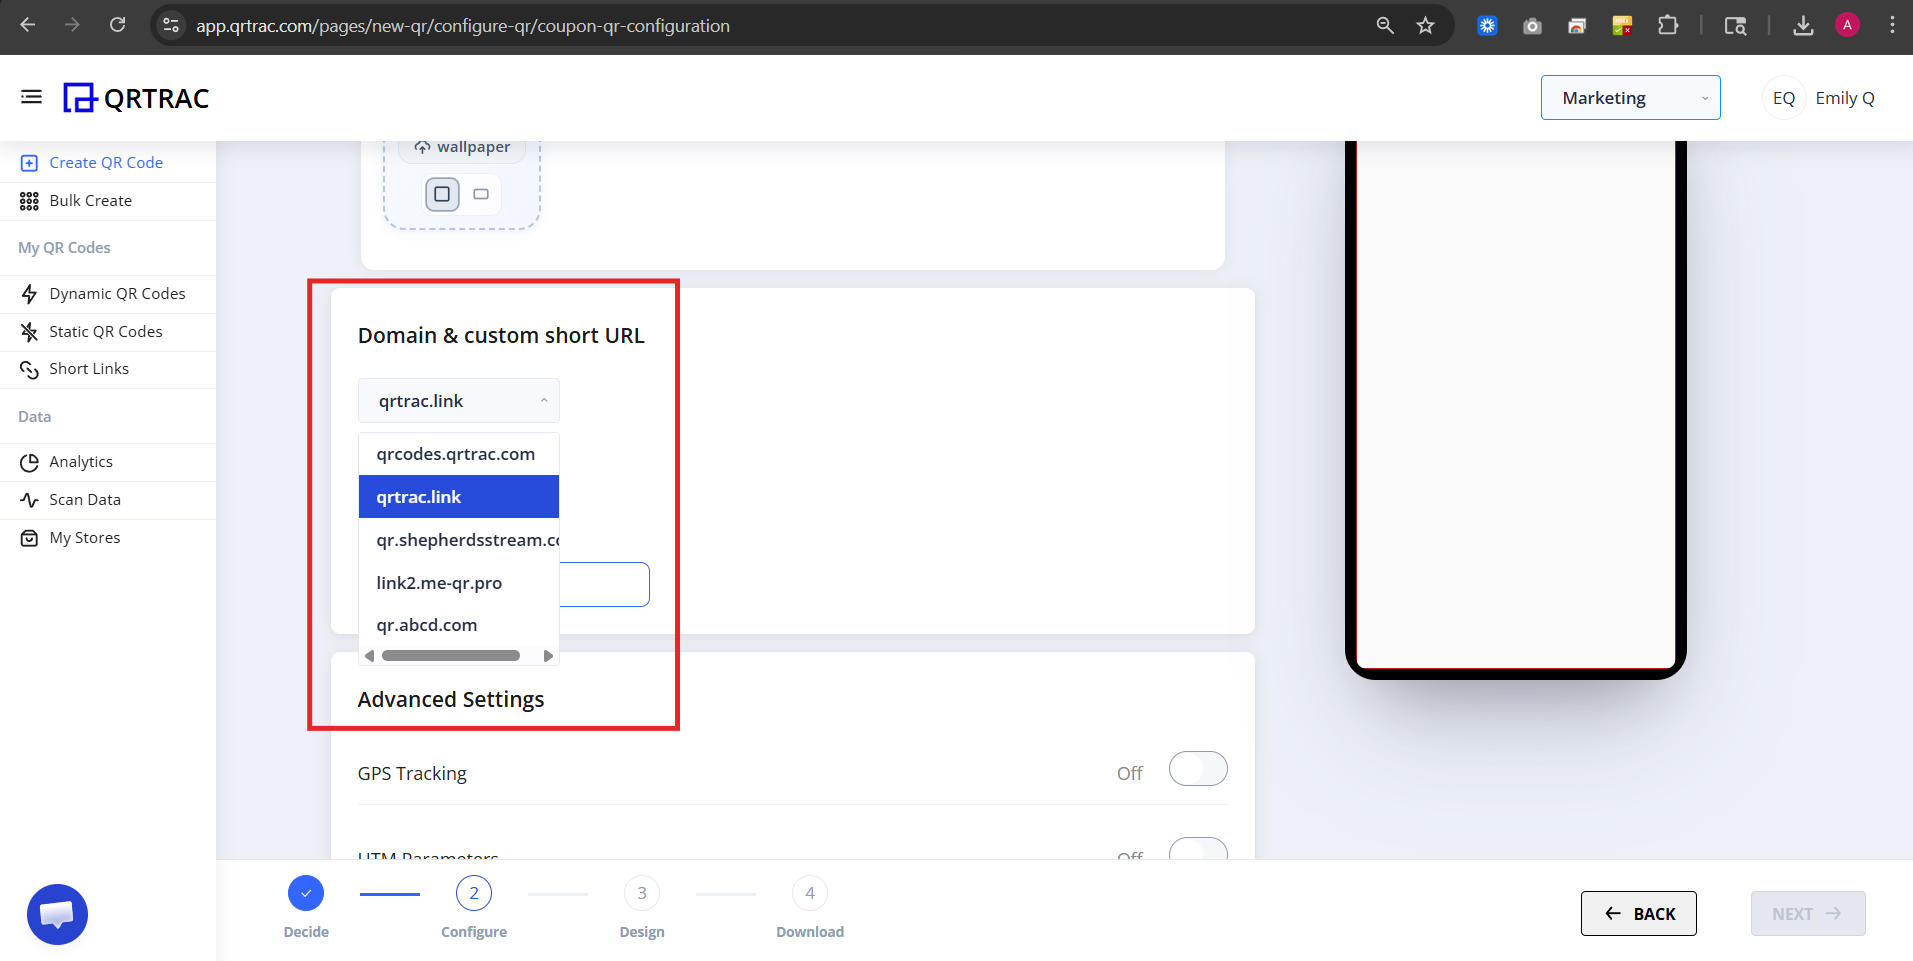
F) Domain & Custom Short URL
You can:
- Select domain
- Enable custom short URL
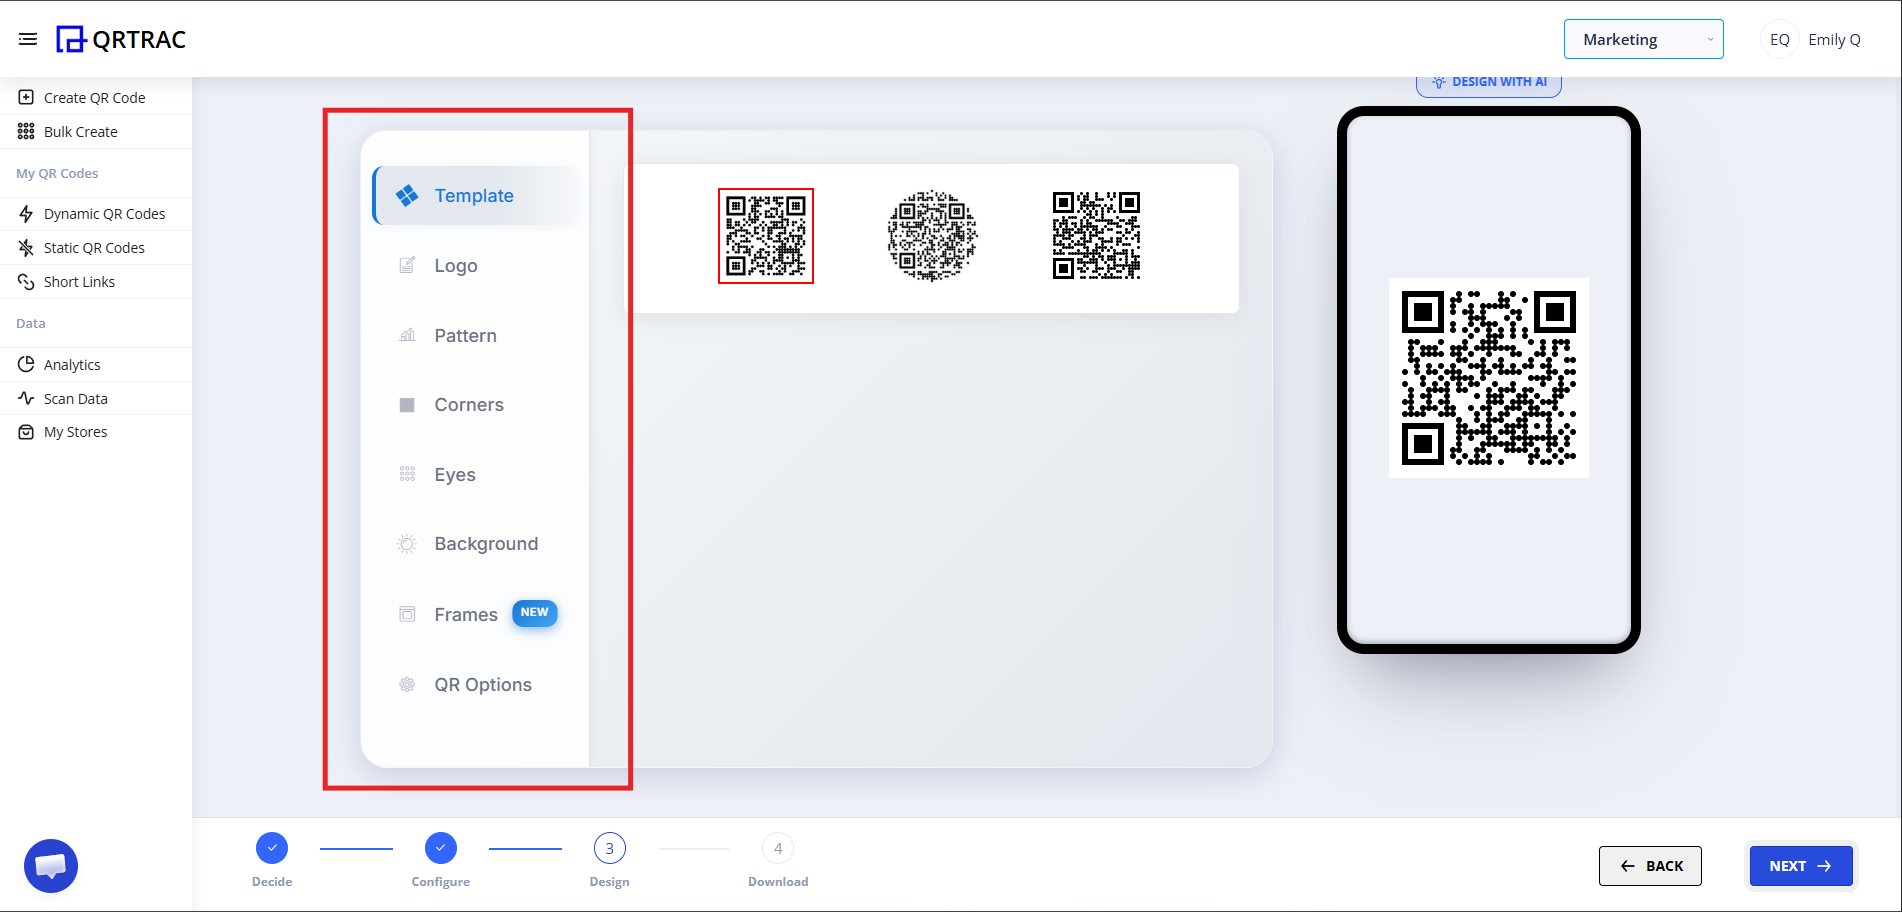
Step 3: Design Your QR Code (Design Phase)
Click Next to customize your QR appearance. You can:
- Change QR color
- Add logo
- Modify QR pattern
- Change eye style
- Adjust background
Dynamic QR — No Reprinting Needed
Update your coupon details — code, expiry, redemption limits and URLs — at any time without reprinting.
Step 4: Review & Download (Download Phase)
Before downloading:
- Preview coupon page
- Check coupon code
- Verify expiry date
- Test redemption
- Scan QR from your phone
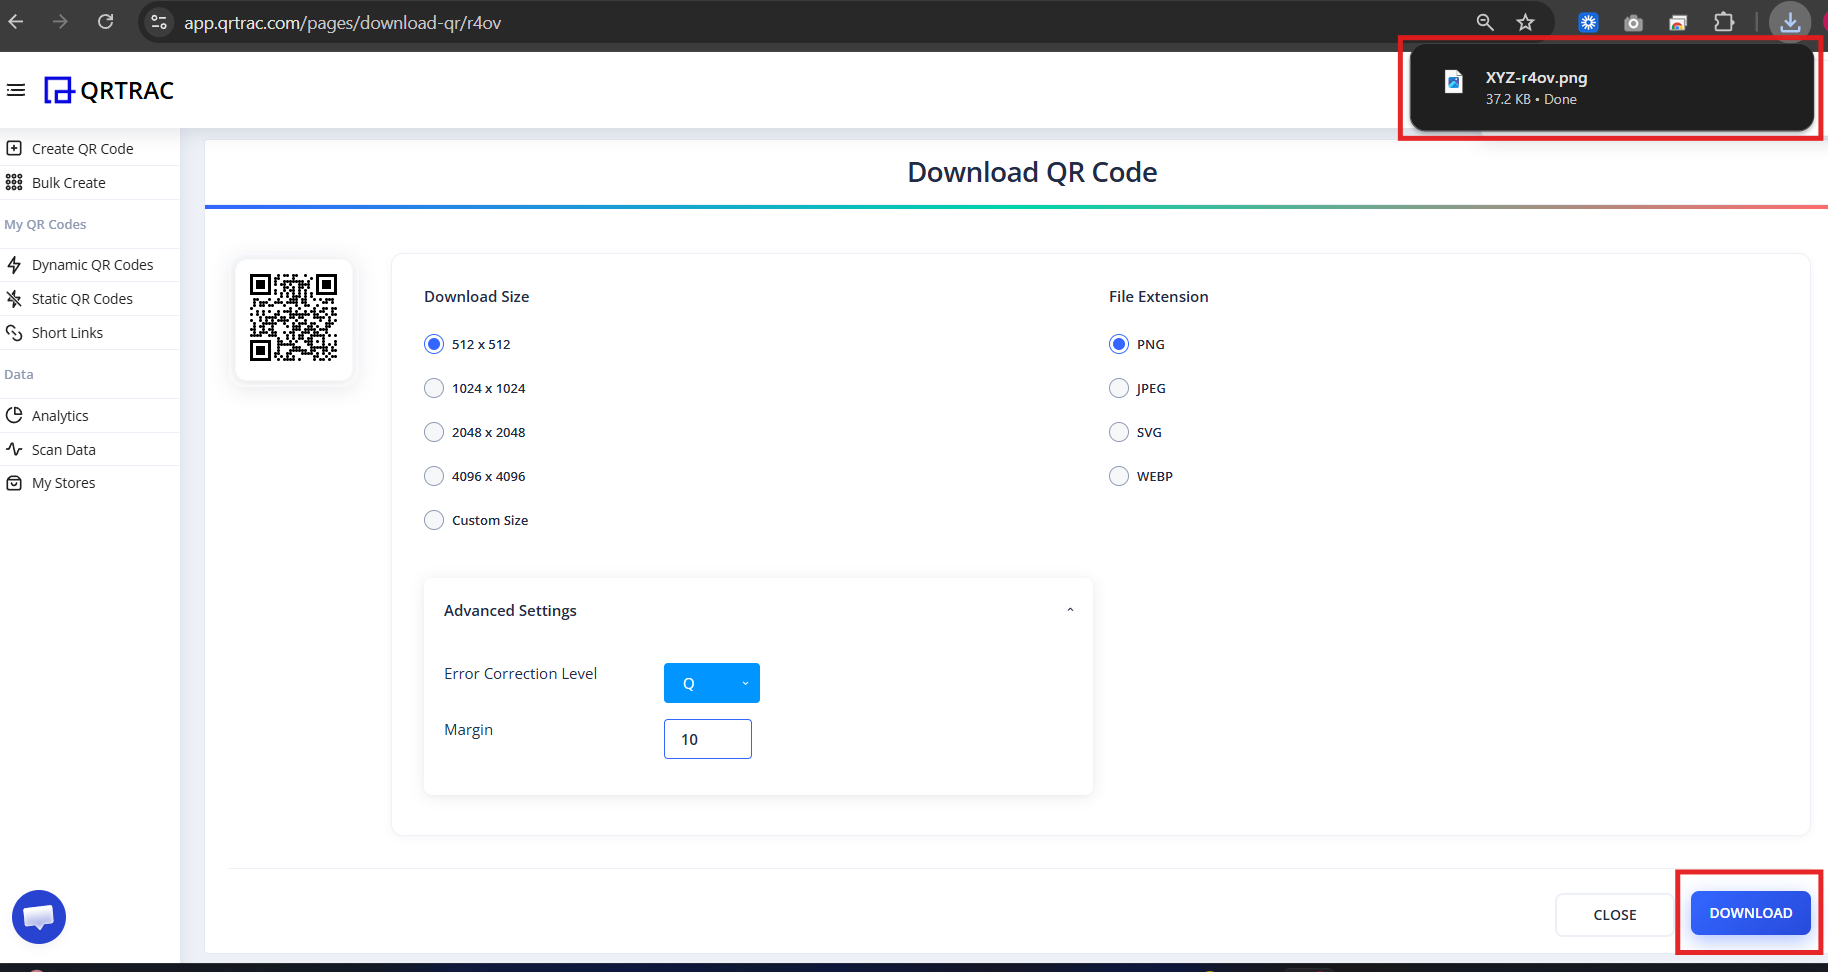
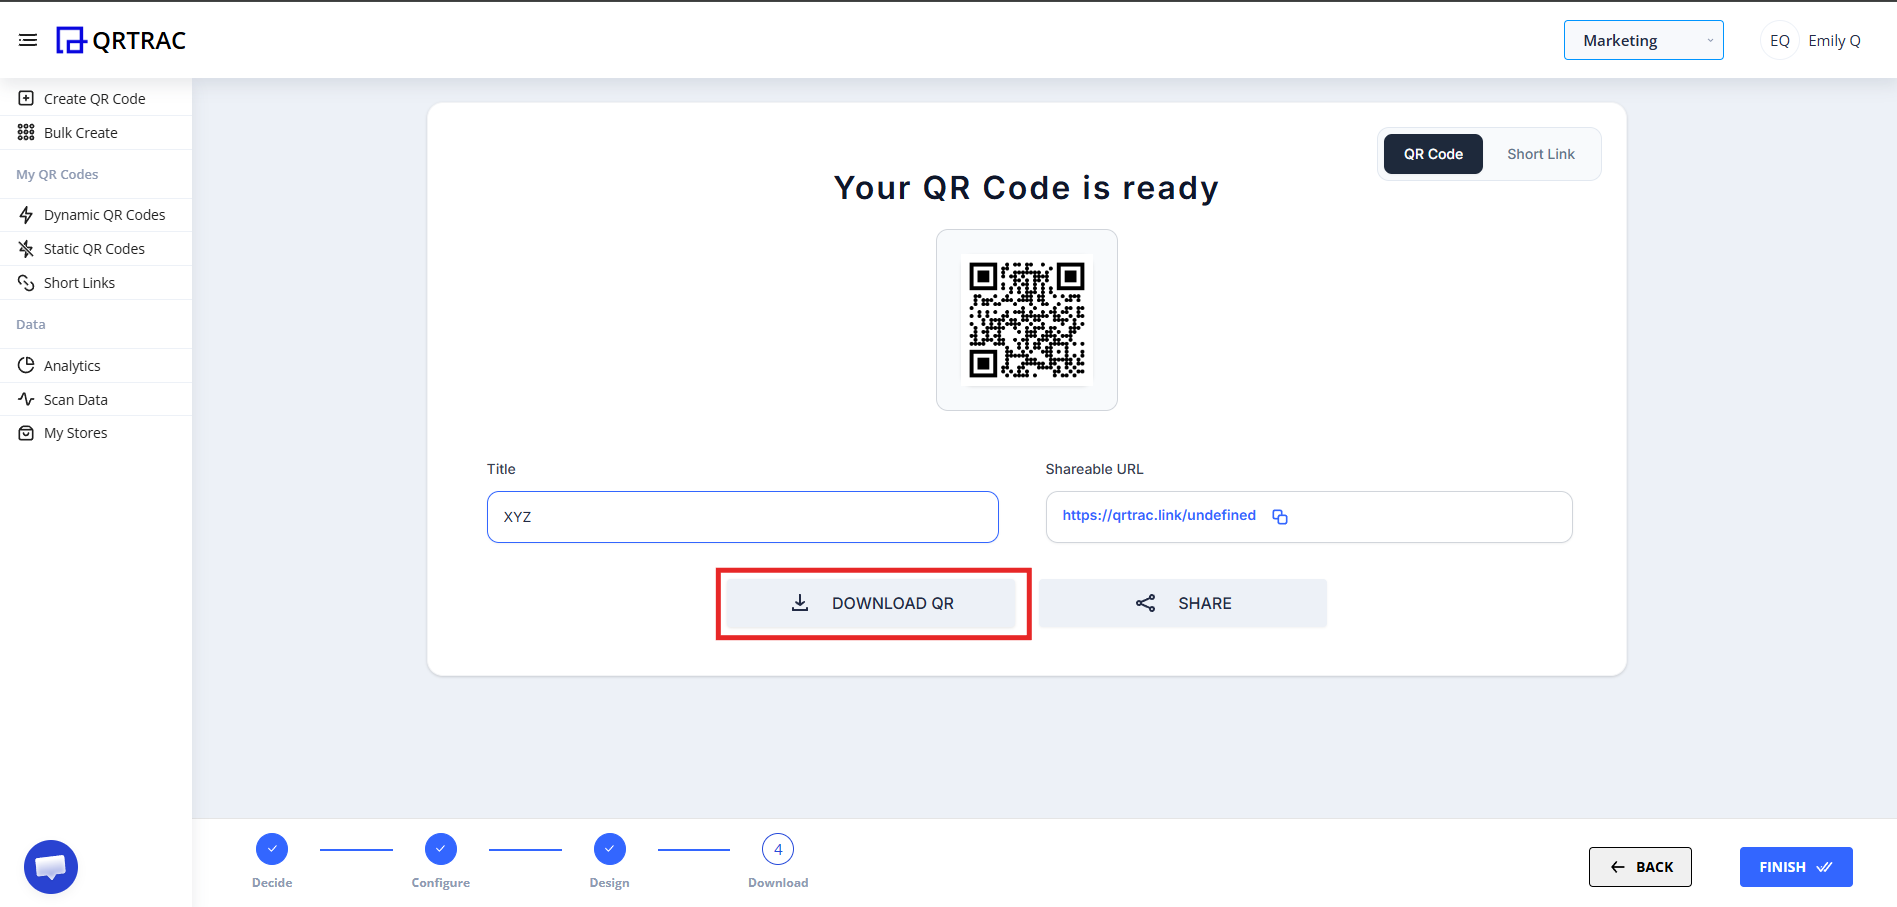
Click Download and choose format (PNG, SVG, etc.)
Frequently Asked Questions
Can I limit total redemptions?
Yes. You can place an absolute cap on the campaign so the offer automatically expires once the limit is reached.
Can I set a minimum purchase amount?
Yes. This protects your margins by ensuring discounts are only applied to high-value carts.
Can I password protect the redemption?
Yes. In-store staff can be required to enter a secret PIN to authorize the redemption at checkout.
Can I use the same coupon QR for in-store and online?
Yes. You can enable both In-Store and Online Redemption toggles simultaneously, giving customers the flexibility to redeem wherever they prefer.
Common Mistakes
- ❌ Launching without an expiry date.
- ❌ Forgetting to set a per-user redemption limit.
- ❌ Linking the wrong online checkout URL.
- ❌ Selecting low contrast QR aesthetics slowing down line throughput.
Launch Checklist
- Expiry limitations active
- In-Store logic toggled
- Locations mapped
- Successfully scanned on phone
Multi-Store Coupon Analytics
Watch this video to learn how to track redemption metrics across multiple physical store locations automatically.